Why do you need an archive brush in Photoshop? Smooth facial skin with an archival brush
You will learn:
- How to customize History panel options.
- What is Snapshot for?
- How to use the History Brush tool.
- How to return color to an object after converting to a b/w image.
- How the Art History Brush tool works.
- How to draw pictures with the Archive Art Brush tool.
Palette History
Before we start using these unusual brushes, we'll have to take a closer look at the History palette.
We have already used the History palette several times in previous lessons. You know that you can undo and redo up to twenty commands (unless otherwise set in the general settings of the Edit Menu - Preferences). Canceled commands can be deleted by dragging them down onto the trash can icon. After performing this action, you will no longer be able to return the deleted command.
At the top of the History palette is a section of images. You can store pictures taken at any stage of work in it. When you open a file, the program automatically takes a photo, which you can return to at any time, regardless of the number of steps
history in the palette. The name of this snapshot is the same as the file name. You can take such pictures as you work, using the icon  camera Create new snapshot at the bottom of the History palette. Just click on it and a new Snapshot1 will appear at the top of the palette. By clicking on the layer with the image, you can rename it. Creating snapshots allows you to bypass the program's 20-step backtracking limitation.
Using snapshots you can easily compare effects. Take a photo before applying any filter. Then select the first photo the program took when you opened the document. Apply the same filter with different settings. By switching between shots, you can choose the best result.
If you close and reopen a document, all snapshots from your last session are deleted from the History palette.
Pictures are added to the bottom of the list. The very first photo will be at the top of the list,
and the most recent one is below.

AutomaticallyCreateFirstSnapshot(Automatically create first photo). A snapshot of the original state of the image is created automatically when you open the document. Leave this checkbox enabled.
Automatically CreateNewSnapshotWhenSaving(Create a new snapshot when saving) A snapshot is created every time you save.
AllowNon – LinearHistory(Nonlinear event recording)
If you check this box, steps from the History palette following the photo will not be deleted. When recording events non-linearly, you can select Snapshot, make changes to the image, and delete just that event. The changes will be added to the bottom of the list. By default, this item is not checked, i.e. If you select a Snapshot and change its state, and then return to the same Snapshot again, then all states following the selected one are deleted from the History palette. The History palette will display the steps in the order in which they were completed. Try working in different modes. Choose the one that seems more convenient to you.
ShowNewSnapshotDialogbyDefault(Open the “New Image” dialog) Photoshop will open a window each time to set a name for the photo.
MakeLauerVisibilityChangesUndoable(Changes to layer visibility are not undone.) By checking this box, all changes to layer visibility (on and off) will be recorded in the History palette. By default they are not recorded in history.
At the bottom of the palette (History) History there is another icon in the form of a floppy disk Createnewdocumentfromcurrentstate(Create new document based on current state). It allows you to open a copy of the document in a new window, which can also be very useful.
Tool- With this brush you can draw from any place in history. The history brush icon should appear to the left of the photo thumbnail in the History palette. What is this brush for?
 1. Most often, an archival brush is used to return color individual elements photos after switching to black and white.
We desaturate the photo. It can be done different ways and the simplest of them: select in the menu Image (Image) – Adjustments (Correction) – Desaturate (Desaturate).
After that, select the History Brush tool.
in the History palette, click on the empty square to the left of the previous layer and simply paint over the area to which we want to return the color, and, no matter what color the archive brush paints, the image will appear in its original color.
 2. You can add motion blur. To do this, duplicate the layer with the moving object and apply the Motion blur filter to it.
with parameters: offset – 495 and angle – 35. Select History Brush (Historical brush)
with soft blurry edges and carefully paint the desired object.
But in my opinion, in order to return the color separate parts photos and create a motion blur effect, it is better to use a layer mask. Duplicate the layer, desaturate it, apply a layer mask, and use a black brush to restore the color, painting over the mask. The only thing that makes the mask better is that you can correct mistakes made with a black brush by switching to a white one.
Let's take a look at the History Brush tool options panel.
Brush- settings of brush parameters.
Mode- brush overlay mode.
Opacity- Sets the opacity of the brush pixels.
Flow– setting the drawing mode taking into account the density of the paint layer.
Airbrush Capabilities) – Gives the brush properties that imitate the spraying of paint with an airbrush.
The history brush does not work on a layer mask and does not work if you have changed the image size.
ToolArtHistoryBrush (Aarchival artistic brush) – draws with stylized strokes using the original Snapshot data or selected archive state. By selecting brush style, diameter, and tolerance from the options menu, you can simulate the real brushes that artists use to paint in a variety of artistic styles.
The Art History Brush tool, like the History Brush tool, uses the selected archive state or Snapshot.
Unlike the Art History Brush tool, by restoring the original data, it adds artistic styles to the image. 
Brush(Brush)- settings for the size and other parameters of the tool brush.
The smaller the diameter of the brush, the more precise the contours.
Mode(Blend Mode)- pixel blending mode when using this tool. It affects how the image interacts with the strokes you apply. There are a total of 7 modes in the drop-down menu.
Opacity(Opacity)- opacity of applied strokes. Set the value high for thick, rich strokes, and low for a light look.
Style(Style)- method of using the tool. The main parameter is Art History Brush. Tight Shot, Tight Medium, Tight Long, Loose Medium, Loose Long, Dab, Tight Curl, Long spiral (Tight Curl Long), Free spiral (Loose Curl), Free long spiral (Loose Curl Long).
Area(Region)- determines the area of influence of the brush on which strokes will be applied. Not to be confused with Master Diameter of the brush.
Tolerance(Admission)-limit the area of influence of the tool. A low value will leave strokes wherever the brush goes. At high value With this option, the brush will only paint on areas that have a different shade compared to the Snapshot.
The History Brush and Art History brush will not work on a mask if you have resized the image, cropped it, or your image in 16 bit mode.
If you are working in 16 bit mode, then go to the Image – Mode menu and select 8 bit. To use these tools after resizing, save the document, close it, and reopen it.
Picture from a photograph.
Before you start painting with the Art History Brush Tool, zoom in a few times to help soften the details.
 4.Create another new layer. Open the brushes palette by pressing F5 or , and uncheck all dynamic options. Increase the size to 200-250 pixels. Select a brush
  Spatter 59 (splash 59) and Tight Long style (compressed long). Area (Diameter) 5 pixels. Make sure that the same brush is selected in the Art History Brush palette. Start applying large strokes over the new layer. Drag the brush up and down along the photo, but don't stay in one area for too long. The longer you stay, the more items are returned. Define the edges, but leave many areas undefined to add later.
5. Create another new layer. And select the Heavy Flow Dry Edges brush 48  (Strong movement of the brush with dry edges with oil), reduce the Opacity, and continue painting. Try switching to a different style, change the diameter, in general, feel like an artist and don’t be afraid to experiment.
6. Create another new layer. Switch to the Brash tool. Select Chalk 23 (chalk 23 pixels) diameter 100-110, Opacity 25%. Hold Alt and select the dark area, this way you will copy the color. Start painting, softening and emphasizing the contours, changing samples of other colors.
7. Create another layer and turn on the Pattern Stamp tool, select the pattern saved at the beginning of the lesson from the samples. In the brushes palette, select a round, hard brush with a small diameter. Use this tool to restore small or thin details lost during the work, and also lightly process the edges of the object. If the image has acquired too much clarity, then the tool will help restore its previous appearance.
8. Merge the layers (Flatten Image) and duplicate the background layer. 
9. Apply the filter – Stylize – Emboss to the copy of the layer. Angle – 135, Height (Height) 14, Amount (Effect) – 122. And change the blending mode to Overlay.
10. Create another layer, fill it 50% gray, or canvas color.
Apply the filter Texture – Texturizer. Select Canvas, Scaling – 200, Relief – 15. Click OK.
Change the blending mode of this layer to Overlay (Overlap) and reduce the opacity.
Questions:
- What happens to Snapshots when you close a document?
– They are saved along with the document.
- They disappear forever.
- Why do you need to select the entire image as a pattern when using the Archive Art Brush [Edit – Define Pattern]?
– To apply texture to an image.
– To add volume to brush strokes with the Pattern Stamp tool.
– To restore small details with the Pattern Stamp tool.
- What should I do to open the current image state in a new window?
– Click on the Create new document from current state icon.
– Click on the Create new snapshot icon.
– In the History palette options, check the Automaticaly Create First Snapshot checkbox.
Homework
1. Desaturate any photo. Using the History Brush tool, restore some of the color to it.
2. Open the flower.jpg file or your own photo. Create a painting using the Art History Brush tool.
Tool Archive brush in is located below the tool group Stamp. This group contains two tools: the history brush itself and Artistic archival brush .
Using a tool Archive brush you can return the image that was before. The parameters of the archive brush correspond to the parameters of a regular brush in the settings panel. Let's look at using this tool to create smoother skin in a portrait.
 Open the program Adobe Photoshop CS5, and there is a photo in it that needs to be retouched. Make a duplicate layer by dragging the layer onto the layer icon in the layers palette. In the future, work on a new layer.
Apply filter Blur - Gaussian Blur . Select the radius so that small skin defects are not visible.

After that, go to palette history , and select the operation as the source for the archive brush Gaussian blur , which will be in the list of operations in the History palette. To select a source, click on the square to the left of the corresponding operation, and a brush image will appear in this square.
Then highlight the previous operation, which is located above, by clicking on its name. The image will become the same as it was before the Gaussian Blur operation.
Now select the History Brush tool and reduce its opacity to about 50 percent in the Options bar. You begin to carefully make brush strokes on the image. The archive brush will return the image to a state of blur, and the skin will become smoother and more beautiful.
Every time you press and release the mouse button, the History palette appears. new operation called Archive Brush. And if you accidentally make a stroke with an archive brush in the wrong place, you can cancel it by selecting the previous operation in the History palette.
 Near clear contours: eyes, nose, mouth, you need to work more carefully, with a reduced brush diameter. And when working with the forehead area, you can, on the contrary, increase the diameter of the brush. And even if you overdo it and the image turns out to be too blurry, you can always reduce the opacity of the top layer, and thus reveal the untouched bottom layer to indicate more of the original skin texture.
History Art Brush Tool blurs the image, creating various artistic effects, the type of which you can choose in the settings palette. This tool is used quite rarely, because there are better methods for creating such effects.
Video on how to create smooth facial skin in a portrait using the History Brush tool
You can get more detailed information in the “All courses” and “Utilities” sections, which can be accessed through the top menu of the site. In these sections, articles are grouped by topic into blocks containing the most detailed (as far as possible) information on various topics.
You can also subscribe to the blog and learn about all new articles.
It does not take a lot of time. Just click on the link below:
First, let's take a closer look at the History panel. If you do not see it in the main program window, then select from the menu: Window -> History. The panel itself looks like this:
It lists all operations performed since the file was opened, the last command in the list is active (highlighted in blue).
There is a slider on the left side of the active line; if you drag it up one line with the mouse, this will cancel the last command. The line of the canceled command will become gray, and what this command did will disappear from your image. If you move the slider down, the command will take effect again, and you will see it in your image.
You can undo and redo up to twenty commands by moving the slider or simply clicking on the line from the last the right command. If you no longer need the canceled commands, you can delete them altogether. To do this, drag the line with this command to the trash (it is located at the bottom of the "History" panel). The command will disappear from the panel and can no longer be returned to it.
At the top of the panel there is a field of images. You can save a snapshot of any image state in it. Currently this field contains one photo, taken by default when opening a file. The snapshot line contains an icon this state image (in this case, untouched by editing) and its name.
The name of the first image is the same as the file name. Click on the photo icon, and the image will return to its original state (as immediately after opening).
As already noted, the History panel stores twenty last teams. Using snapshots gets around this problem. Simply after completing each stage of image editing, you can take a photo.
You can save snapshots from any image state by placing them in the snapshots field. To do this, select desired condition document (line) and click on the camera icon at the bottom of the palette. A new snapshot will appear that matches the selected file state. During operation, you can return to this state at any time by selecting it with a mouse click.
Snapshots are very useful in your work, for example you can take a photo before and after applying a filter. Then select the first photo and try the same filter with different settings. By switching between images it is easier to select the optimal settings.
It often happens that we only need to partially transition to some state. This is why the “archive brush” comes to the rescue. Now we get to the main topic of the lesson. Left-click on the tool -archive brush-, the tool selection window will open:
- archival brush- Allows you to draw from any snapshot in the History panel. This allows you to return not the entire state of the image, but only part of it.
- archival art brush- also restores the image state from a history snapshot, but at the same time allows you to apply various artistic effects.
Archive brush
Let's say we open this image:

 Suppose we need to add clouds to it. To do this, take the eyedropper tool (as in lesson 4) and click on the blue background, the main color will become blue. Now on the menu bar, click on Filters -> Render -> Clouds.
Now our image looks like this:


Please note that we have not created a new layer, we are editing an existing image.
If we now click on the "Open" line in the "History" palette, then our clouds will disappear, but we want them to remain, but the doves to be visible.
So we'll use the History Brush tool. In the "History" palette, check the box next to "Open". Let's take the "History Brush" tool from the toolbar (select a brush with a diameter of 100 and with jagged edges) and click it several times in the area where the pigeons are. The clouds will disappear where we click.


In other words, we can change our image in different ways and, if after that we want to return part of the image to its original form, then we will take the “History Brush” tool and erase everything unnecessary with it. The main thing is to indicate which state of the image to use as a source; for this, you need to check the box (in the form of the brush itself) next to it in the “History” panel and the layer on which we want to restore the image.
Archival art brush
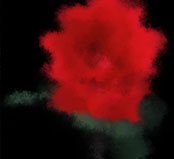
This tool cannot be called frequently used, but still consider an example of its use. Open a photo of a flower. I have this rose:

Create a new layer, name it "Background", fill it with white paint and set the opacity to 70%. This is an auxiliary layer, it will help us see what we are drawing.
Create another layer, call it “Rose”, we will paint on it.
Our image now looks like this:

Make sure the "Rose" layer is active and grab the Art History Brush tool from the Tools panel. Now let's configure its parameters in the options panel:
Click the triangle next to the brush to select it.

Now click on the triangle in the circle and in the submenu that opens, select the “Art History” brush set -> Add.
Now select the "Oil sketch" brush.

Now set the rest of the parameters: Mode - Normal, Opacity - 40%, Style - Short Touch, Diameter - 30, Tolerance - 0.
Now go over the entire canvas with the brush, just try not to overlap the strokes one on top of the other. It should look something like this:

Now change the following brush parameters: diameter - 30, style - compressed short, diameter - 10. And brush it only on the flower itself (mine is a red rose). It should look like this:

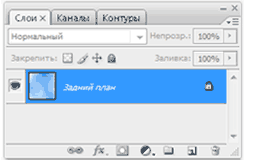
This is how we made a drawing from a photograph using an archival art brush oil paint. Notice in the Layers palette, we actually painted this rose in the Rose layer:

You can turn off the -background- and -background- layers (click on the eye), we don’t need them anymore. That's all for today. Next time we will learn to draw various shapes.
Each lesson teaches you how to work with a command or tool. How often do we use the History Brush tool in our work? What photo processing effects can be made with the "History Brush" tool? You will find the answer to these questions in the proposed lesson.
Let's open the image.
Paint the entire image white.
Select the History Brush tool. The tool parameters are the same as for a regular brush. Select the brush with the imprint in the form of a blot and set its size to greater than “100” pixels. In our example, brush number “27” with a size of “147” pixels is selected.
We begin as an artist, making strokes with an archival brush on a white canvas. The effect of a painted picture is obtained.

Processing photos with uneven edges in the form of individual brush strokes looks good in landscapes and still lifes.

We make prints with an archival brush, the result is different.
Try different processing options with different brushes, remembering to set big size brush mark. With a small brush size the effect is not so expressive.
Sometimes you need to make the background blurry so that all attention is directed to central figure. The archive brush will also be indispensable in this case. Open the image, apply any filter with blur, and then simply draw over the shape with the archive brush.

Artistic archival brush used by artists. If you want to make an oil painting from a photo, take the Art Brush tool, select the size, shape and paint.
The Art History Brush tool options differ from regular brushes in that you can choose your drawing style.

It is advisable to choose a small brush size, because every time you touch the brush to the image, a colored spot of arbitrary shape appears.

We carefully paint over each petal of the rose with short touches and get something similar to a watercolor drawing.
PHOTOSHOP - LESSON 8. ARCHIVE BRUSH AND "HISTORY" PANELPhotoshop - Lesson 8: History Brush and History Panel
First, let's take a closer look at the History panel. If you do not see it in the main program window, then select from the menu: Window -> History. The panel itself looks like this:It lists all operations performed since the file was opened, the last command in the list is active (highlighted in blue).
There is a slider on the left side of the active line; if you drag it up one line with the mouse, this will cancel the last command. The canceled command line will turn gray and what the command did will disappear from your image. If you move the slider down, the command will take effect again, and you will see it in your image.
You can undo and redo up to twenty commands by moving the slider or simply clicking on the line with the last command you needed. If you no longer need the canceled commands, you can delete them altogether. To do this, drag the line with this command to the trash (it is located at the bottom of the "History" panel). The command will disappear from the panel and can no longer be returned to it.
At the top of the panel there is a field of images. You can save a snapshot of any image state in it. Currently this field contains one photo, taken by default when opening a file. The image line contains an icon of the given state of the image (in this case, untouched by editing) and its name.
The name of the first image is the same as the file name. Click on the photo icon, and the image will return to its original state (as immediately after opening).
As already noted, the last twenty commands are saved in the History panel. Using snapshots gets around this problem. Simply after completing each stage of image editing, you can take a photo.
You can save snapshots from any image state by placing them in the snapshots field. To do this, select the desired document state (line) and click on the camera icon at the bottom of the palette. A new snapshot will appear that matches the selected file state. During operation, you can return to this state at any time by selecting it with a mouse click.
Snapshots are very useful in your work, for example you can take a photo before and after applying a filter. Then select the first photo and try the same filter with different settings. By switching between images it is easier to select the optimal settings.
It often happens that we only need to partially transition to some state. This is why the “archive brush” comes to the rescue. Now we get to the main topic of the lesson. Left-click on the tool -archive brush-, the tool selection window will open:
- archival brush- Allows you to draw from any snapshot in the History panel. This allows you to return not the entire state of the image, but only part of it.
- archival art brush- also restores the image state from a history snapshot, but at the same time allows you to apply various artistic effects.
It is better to understand the meaning of these tools using examples.
Archive brush
Let's say we open this image:

 Suppose we need to add clouds to it. To do this, take the eyedropper tool (as in lesson 4) and click on the blue background, the main color will become blue. Now on the menu bar, click on Filters -> Render -> Clouds.
Now our image looks like this:


Please note that we have not created a new layer, we are editing an existing image.
If we now click on the "Open" line in the "History" palette, then our clouds will disappear, but we want them to remain, but the doves to be visible.
So we'll use the History Brush tool. In the "History" palette, check the box next to "Open". Let's take the "History Brush" tool from the toolbar (select a brush with a diameter of 100 and with jagged edges) and click it several times in the area where the pigeons are. The clouds will disappear where we click.

In other words, we can change our image in different ways and, if after that we want to return part of the image to its original form, then we will take the “History Brush” tool and erase everything unnecessary with it. The main thing is to indicate which state of the image to use as a source; for this, you need to check the box (in the form of the brush itself) next to it in the “History” panel and the layer on which we want to restore the image.
Archival art brush
This tool cannot be called frequently used, but still consider an example of its use. Open a photo of a flower. I have this rose:

Create a new layer, name it "Background", fill it with white paint and set the opacity to 70%. This is an auxiliary layer, it will help us see what we are drawing.
Create another layer, call it “Rose”, we will paint on it.
Our image now looks like this:
Make sure the "Rose" layer is active and grab the Art History Brush tool from the Tools panel. Now let's configure its parameters in the options panel:
Click the triangle next to the brush to select it.

Now click on the triangle in the circle and in the submenu that opens, select the “Art History” brush set -> Add.
Now select the "Oil sketch" brush.

Now set the rest of the parameters: Mode - Normal, Opacity - 40%, Style - Short Touch, Diameter - 30, Tolerance - 0.
Now go over the entire canvas with the brush, just try not to overlap the strokes one on top of the other. It should look something like this:
Now change the following brush parameters: diameter - 30, style - compressed short, diameter - 10. And brush it only on the flower itself (mine is a red rose). It should look like this:

This is how we made an oil painting from a photograph using an archival art brush. Notice in the Layers palette, we actually painted this rose in the Rose layer:

You can turn off the -background- and -background- layers (click on the eye), we don’t need them anymore. That's all for today. Next time we will learn to draw various shapes.