Paper hedgehog costume. prickly hedgehogs
Moms who know about the special love of the baby for the hedgehog will want to make their babies on new year holidays their favorite characters. Where to start and how not to spend a fortune on 1 hedgehog costume? How to make it beautiful and suitable to wear for other holidays? How to modify existing clothes?
If your child decides to be a hedgehog from Great love to the hedgehog from Smeshariki or Sonic, then in front of you detailed instructions how to make this suit.
What does a universal hedgehog costume look like?

1. Hedgehog option for mother needlewoman:
panties, shorts or overalls;
shirt or turtleneck, blouse;
vest embroidered or pasted over with needles;
headdress;
makeup;
mittens;
tights or stockings;
sandals or boots.
2. Simplified With Cloak Or Cape:

option with a raincoat and a hood or headdress;
jumpsuit or other option;
decorations from mushrooms, leaves, fruits.
The cape can be kept on the hood, and be embroidered with needles.
3. Boy Hedgehog Costume:
overalls in dark tones: black, gray, brown;
a white shirt (with a black bow will be a real gentleman) or a turtleneck;
panties or shorts, for a creative hedgehog we choose shorts in a cage;
the vest will fit from the suit, it is enough just to decorate it or sheathe it with needles;
the hat can be with or without a hedgehog muzzle;
decorations for the whole costume;
face makeup.
4.Hedgehog Costume for Girl:

Dress;
a headdress made of paper with needles, resembling a cape;
tights;
sandals;
makeup.
5. The second version of the costume without a dress for a girl:
a light-colored suit of shorts and a vest;
headdress;
everything is embroidered with needles and mushrooms, leaves are added;
socks or tights;
sandals.
6. The third option for those who know how to knit:
A hat made of gray or black grass decorated with berries, fruits, mushrooms;
vest from the same threads;
Tuttsi skirt (no need to sew) or shorts;
light blouse;
tights;
sandals;
makeup.
The hedgehog has ears, so it's better to tie them, this will make the costume look more realistic!
How to make needles on a hedgehog costume?
Fur
Any one will do important point, varnish or water with sugar is suitable to give a junkie, but option 1 is preferable, and the effect is immediately noticeable.
Artificial or natural, depends on the availability in the home bins. Sew a piece on the back (overalls, vest, blouse) and head (hood or hat) and give them a stable look of needles.
Foam needles:

1. Cut the foam rubber into sticks 2 by 2, then make sharp tips.
2. Decorate with gouache. To do this, mix gouache and PVA glue. It is better to make them 2 colors, so they look more realistic and voluminous.
3. Allow to dry and sew or glue to a vest, raincoat or other product.
Knit needles:
1. We use grass threads and do not make needles separately.
2. We knit with elongated loops, but then they will hang in appearance, which does not look beautiful.
Garbage bags
The same problem as with knitting is hanging needles.
We tie the cut packages onto a connected mesh or scarf. We get needles in large quantities.
From paper:
1. Cut into strips and cut each piece into a fringe.
2. Glue on a raincoat made of paper and decorate with gouache.
3. Make cones and glue or sew to the desired piece of clothing.
Sew from fabric
A similar problem is that the needles do not stand, but hang down.
Fabric needles:
1. We make in the form of triangles;
2. We cut the fabric in the shape of rhombuses and sew it to the fabric in the middle;
3. Cut strips of fabric, cut each into needle-shaped edges and sew to the product.
From rain or tinsel
True, the amount of such source material should be large and approximately in the same color.
From an artificial Christmas tree
For those who have an old unwanted artificial Christmas tree, use its branches, we recommend painting them from green to brown or gray.
How to knit a hat for a hedgehog?
For sewing, you need a pattern and an idea of \u200b\u200bhow your hedgehog will look.
Take a baby hat, it's better. Just try to sew on top of the muzzle of a hedgehog with eyes and ears.
We knit a hat for a hedgehog:
1. Take the finished baby hat and draw a sketch.
2. Pick up the necessary threads and start knitting in a circle. If you use weed threads, then you already have needles.
3. Knit a hat according to the principle of a baby cap by adding strings.
Other options for creating a hedgehog hat:

1. A hedgehog is made from a bottle, for those who are not good at sewing or knitting, we show a finished version, it remains only to repeat and decorate.
2. From the cones, stick cones on the base, they can also be used for needles on the back. Just consider their weight so that they are not too heavy for the child.
3. From salt dough, make a torso on the shape of the head so that the child's head can easily fit there. When the hedgehog is baked and varnished, all that remains is to choose the inside and sheathe it with fur or cloth.
A quick option from plastic utensils
4. A hedgehog is cut out of a plastic plate, decorated and sewn on both sides of a cap or other cap. Try to glue both halves and put them on like a cap on your head.
What should be the makeup of the hedgehog costume?
Use only cosmetics with ingredients that are harmless to children's skin. Another option is to limit yourself to drawing a nose, mustache.
For those who know the art of painting, we offer this option:
The main tone is darker than the skin, brownish, darker towards the edges of the face;
make the contour dotted with needles, mix black gray and white paint;
black tip of nose with bulla speckled;
repeat over the centuries.
We hope that you will be able to choose the right version of the costume for your baby or baby!
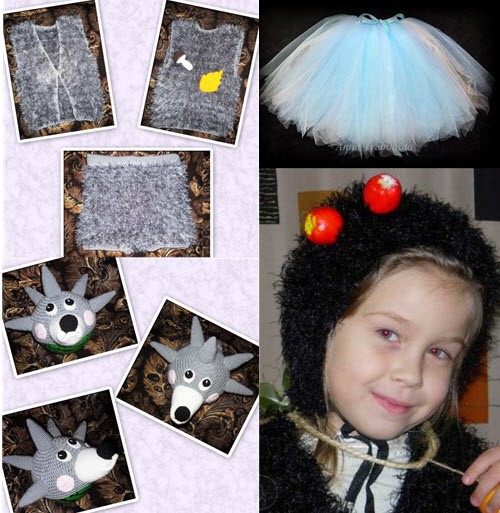
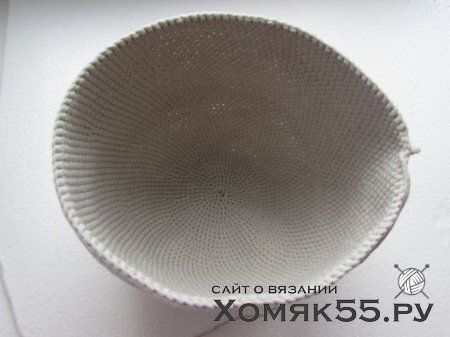
Fashionable now animal hats do not leave indifferent neither children nor adults. Both of them are happy to wear hats in the form of charming animals - bunnies, bears, owls, etc. We did not stand aside and invite you to knit such an animal hat, which will undoubtedly be exclusive.Knitting such an animal hat will require the following materials: hook No. 2, Vera yarn of sand color (brown, gray, black), any black yarn of medium thickness, Grass yarn for decorating needles, embroidered eyes on a textile basis, a needle and thread, sintepon and scissors.
We start knitting by knitting 5 air loops.

We close the resulting chain into a ring, and then we begin to knit single crochets in a circle, in the first row making additions in each loop, in the second - through the loop, in the third - every three loops.


To determine if reductions are needed, place the flat disk knitted earlier on the top of the child. If one edge reaches the level of the crown, then you can move from knitting the crown to knitting the side walls of the animal hat.
In this case, we do only a few decreases - 1-2 decreases per row during the knitting of two rows. You don’t need to do them anymore, because due to knitting without additions, the product will fold by itself. Of course, this largely depends on the yarn, but in most cases, such a transition requires no more than 2-3 rows with decreases.

Now you will need to knit an elastic band so that the hat is securely fixed on the baby’s head and does not rotate from side to side even with active movement. To do this, we knit 3 air loops for lifting, and then we knit 1 row of double crochets.

Next, we knit the gum itself, which consists of embossed double crochets - front and back. These columns will alternate in a 4x1 ratio, that is, first we knit 4 facial relief columns, and then 1 purl.
To make a front embossed double crochet, double crochet, and then insert the hook under the double crochet of the previous row as shown in the photo:


To make a embossed purl stitch, yarn over, and then insert the hook as shown in the photo (from the wrong side):


Knitting an elastic band in the same way, we get this pattern:

Now fold the hat in half and measure its length with a centimeter.

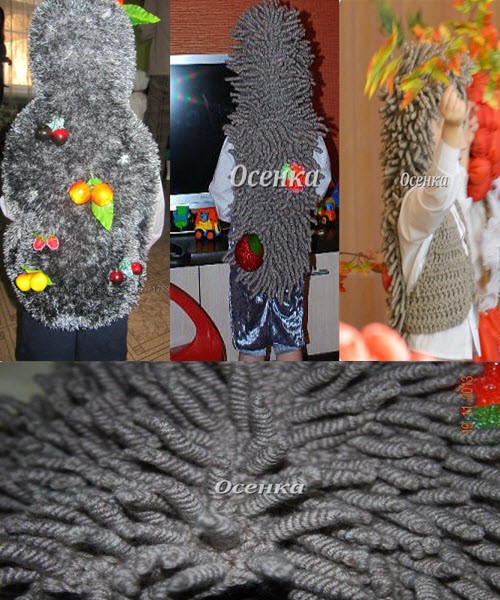
From the yarn "Grass" we knit a chain of air loops, the length of which is equal to the length of the cap folded in half.

We knit a fabric from double crochets.

As soon as the rectangle is ready, we knit a small ledge on the side:

We do the same on the other side:
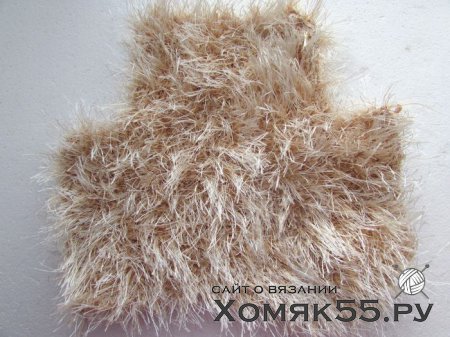
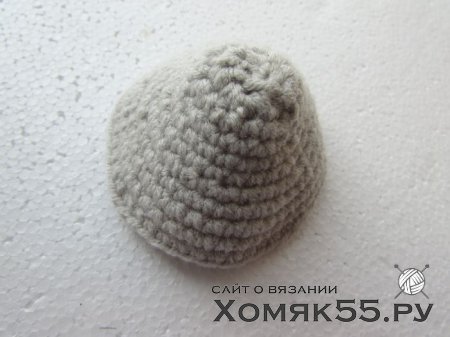
We put the "needles" aside and begin to knit the details. To make the spout, we knit 5 air loops, close them in a ring and knit 2 rows of single crochets from the addition in each loop. In the third row, we make 2 decreases and knit single crochets. In the fourth and subsequent rows, we make 3 additions so that the knitting takes on the shape of a cone.

Similarly, we knit until the muzzle of the hedgehog reaches the desired length.
The ears are knitted as follows: we collect 5 air loops, we close them in a ring, and then we knit single crochets only up to half of the ring.
Holidays are coming literally on the heels and urgently need a suit for a matinee in kindergarten or school. What is offered in stores is not always pleasant: the child wants to be individual, not like others. Therefore, it is worth sewingdo-it-yourself hedgehog costume .
Necessary materials
To start making a costume, you need to look through the child's wardrobe. Since for the first version of the costume the main detail depicting a hedgehog will be a cap or panama hat, the shirt, vest and pants are selected from the son's clothes. Clothing should be brown or reddish.And from the old panama, cutting off the fields from it , sew the hedgehog itself.
Needles, needles
Triangles cut out of dark fabric , folded into a cone and sewn together. A little cotton wool is stuffed into them, and they begin to sew to the panama hat from the bottom in a circle. How many needles do you needand how often to sew them - your will . The more often, the more beautiful. Next, the muzzle is sewn: a cone is cut out bigger size from light fabric, stitched, stuffed with cotton wool, painted. It is necessary to fix the muzzle to the panama hat, from the front side.DIY hedgehog costume - made.

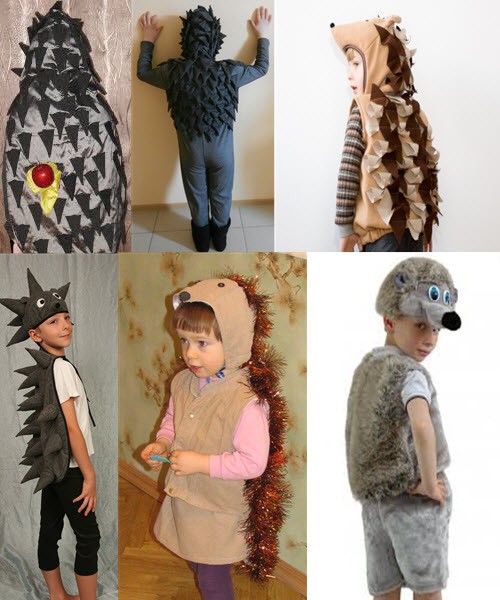
Difficult option
Another version of the costume will require more strength and skill from the needlewoman. Yes, and there is a lot of material to prepare. For sewing, it is necessary to prepare velor fabric andsew a jumpsuit with a hood . Make a fastener in front with a zipper and Velcro. From white velor, you need to sew an oval abdomen, which will also be fastened with Velcro. Now we need to do the needles.They are made from foam , painted with brown gouache and sewn to the back and hood. You can make needles in the same way as in the previous version: sew cones, stuff with cotton wool and sew. Ears combined from two colors are also attached to the hood.

To add brightness to the costume, you need to sew mushrooms, apples and fasten among the needles on the back and head. Another version of the costume is ready.
Craftswomen's suggestions
A lot of options with the application of patterns and instructions can be found on the site, in the category "do it yourself ». If you follow the directions and advice , then more complex options can be sewn. For children already school age, primary school, the outfit willlarger, and spend labor - more. But the effect of the costume, which is sewn jointly with my daughter, is always higher than the purchased one. The variant of the beige hedgehog, presented below, involves large needles that are sewn on a sewing machine, stuffed with padding polyester and manually sewn to the back and hood. The belly is cut out of fleece yellow color and sewn on the front. Classic variant for a girl - a hedgehog.


fur hedgehog
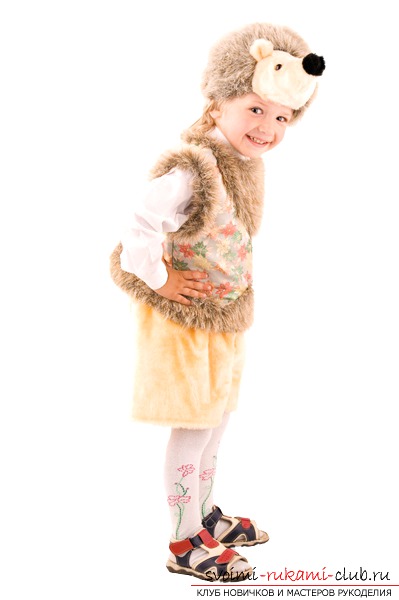
The most convenient option for tailoring a hedgehog costume is to use faux fur in brown or dark gray colors. For the costume, you need to sew a dark-colored vest and trim it with fur around the entire perimeter and along the edge of the sleeve. A cap is sewn separately, to which the ears are sewn.Mushrooms, leaves and apples are made separately.They can be made from fabric, stuffed with cotton. Or maybe from colored paper. Ready-made forest fruits are sewn on a hat and a vest. And on the face you need to do makeup in the form of a muzzle of a hedgehog. Just draw a "face", a muzzle.This suit is complemented by a beautiful white shirt and trousers to match the fur.. It turned out nice and finished. In this option, there is also a lot of room for the imagination of the needlewoman!
DIY hedgehog costume - ready.
On the site of needlewomen, visitors can use all the patterns offered by the masters and learn how to sew and knit outfits for their children. The main thing is that everything will be made with love and imagination.
You will need
- - cap or panama;
- - dense fabric of gray and brown color;
- - light dense fabric;
- - needle;
- - threads;
- - colored paper;
- - PVA glue.
Instruction
Choose clothes in a reddish-brown color scheme: a shirt, overalls or shorts, a vest and tie will add solidity to a hedgehog. Complement costume headdress with thorns, like hedgehog.
Choose fabrics in grays and browns. It can be drape or cloth from an old coat or corduroy and denim. Cut the fabric into fairly long strips with a width of three to five centimeters. The length of the strips may vary. Cut the finished strips across every 3-5 cm, not reaching the edge of 0.5 cm. Fold each part of the strip in the form of a triangle and iron, sew the open edge.
Sew the blanks by hand in a circle, starting from the bottom of the cap, shift the needles of each next row. Make several separate needles and sew them with a blind seam at the crown. Cut out leaves, apples and mushrooms from colored paper and glue them with PVA glue to the needles.
Make a muzzle hedgehog. Cut out an equilateral triangle from a light fabric, fold it in half and sew the long side. Turn the piece right side out. Fill the resulting bag with filler: cotton wool or padding polyester. Sew on two round buttons for the eyes. Embroider the nose with black thread and the mouth with red thread. To prevent the hat from flying off the head during the holiday, sew on strings or a hat elastic.
The hedgehog is a cute little inhabitant of the forests, children really like this image, and if they heard a hedgehog stomping and puffing, they will be happy to portray his habits on the matinee, dressed up in a funny costume with thorns on his head and back.
You will need
- For the jumpsuit with ears and belly:
- - brown corduroy or spandex;
- - long zipper;
- - Velcro tape;
- - a piece of pink satin fabric;
- - a piece of fleece
- For spines:
- - fabric scraps brown, black, gray color.
- - thin foam rubber;
- - brown gouache;
- - Super glue.
- For decoration:
- - pieces of felt red, yellow, green.
- For a hedgehog costume from a hat, vest and trousers:
- - cap or panama hat;
- - a vest and trousers of brown or gray color;
- - half a meter of black fabric for "thorns";
- - pieces of synthetic winterizer or cotton wool;
- - a piece of black faux fur;
- - pieces of felt different color for decoration;
- - 20 cm of light fabric for the "muzzle";
- - 3 black beads for the eyes and nose.
Instruction
If you have opted for an old unwanted shirt, rip it apart, leaving only the fronts and back. Cut the desired length, then give the edges of the shelves a semicircular shape.
Gently fold the fabric so that the wrong side is on the outside. Lay the pattern pieces on the fabric and pin the pieces in place. Use needles or pins to secure.
Cut out the details of the vest, while leaving 4-5 cm on the sides (about 2 cm for the seams, and 2 cm for the "reserve"; so the vest will not hinder the movement of the child). Overcast the edges of all parts manually or using a sewing machine. Then sew the shoulder parts of the shelves and back. You need to do this from the wrong side. Also - on the wrong side - sew the side seams.
Using an iron, smooth out all the joints of the vest parts. For armhole trim, use bias trim in a color that contrasts with the main fabric. Sheathe all the edges of the vest with it (start and end in the middle of the back). Sew on a detachable snake or sew on buttons on one side, sew on patch loops from the inlay.
Cut out patch pockets, trim them with bias tape and decorate with appliqués, embroidery or fringes. Sew patch pockets if required. Depending on the style of the vest, the pockets can be made of a different color or tonal fabric. The children's vest is ready.
Related videos
Sources:
- vest to sew in 2017
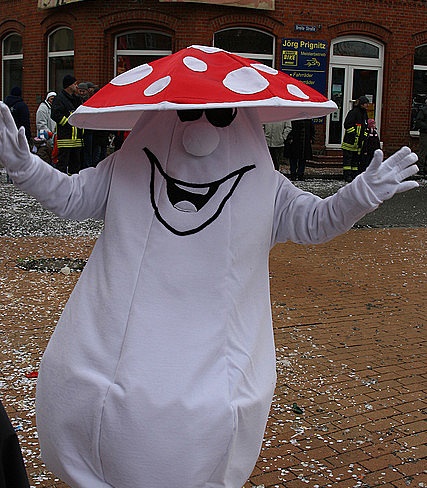
You can buy a children's mushroom carnival costume for the Autumn or New Year holiday in the store, but it's much more fun to make it yourself with your child. Working on a costume is a pleasant occupation, a festive mood immediately appears.

You will need
- Shirt, trousers or skirt, red or brown fabric 1 m, white fabric 0.5 m, foam rubber 0.3 m
Instruction
The fly agaric costume looks bright and elegant, it is quite simple to make it. You need a shirt and trousers in beige, white or yellowish. Gather the sleeves and the bottom of the pants with an elastic band. Draw blades of grass, leaves on green fabric or paper, cut and sew or glue to the bottom of the trousers. Make a shirt-front from red fabric in white large peas (you can draw peas on the fabric yourself). You can complement the fly agaric costume with a cape made of the same fabric.
For a girl, sew a fluffy red skirt and a white blouse. Decorate the cuffs and collar of the blouse with grass blades of green fabric. Decorate the hem of the skirt with an applique of mushrooms.
The main detail of the costume is a hat. The easiest option is to make a hat out of paper. Take thick paper: whatman paper, thin cardboard, cut out a circle with a radius of 40-45 cm, fold it into a cone and glue it. Paint the hat red, scatter large white circles across the red field. Attach lace or elastic to the hat.

You can also make a fly agaric hat out of an old brimmed felt or straw hat. Take a piece of red fabric and fit the frame. Draw on white fabric acrylic paint large peas.
Similarly to the fly agaric mushroom, you can make a children's costume of a boletus mushroom, the difference is in the color and shape of the hat. A white shirt, brown trousers and a vest will suit both a boy and a girl. To make a hat, take foam rubber or batting, use a hat with a brim as a frame. Overlay the crown with foam rubber to give it a convex-rounded shape and sheathe it with a brown fabric. Finish the inside of the hat with foam rubber, lined with white fabric.

A more complex option is a hat in the form of a beret. From a white or beige fabric, cut out the base - a strip 10 cm wide and long, equal circle heads. Fold it in half and lay it with a glue cloth to shape it. Cut out the top of the hat in the shape of a circle from brown fabric and cut the same circle from light fabric. Cut a hole in a light-colored fabric, the diameter of which is equal to the circumference of the head. Fold the circles right sides in and sew, then turn inside out. Cut out the lining in the same way and attach to the top.

Cut out two circles from the foam rubber: one with a diameter equal to the diameter of the top of the hat, the other slightly smaller. Connect them together and make a hole in them around the circumference of the head. Insert the workpiece into the case, between the lining and the top, and sew this entire structure to the base. Boletus mushroom cap is ready. Based on these ideas, you can make your own original mushroom costume.
Related videos
When going to a holiday, children want to be like their favorite cartoon characters. Most often, bunnies and squirrels no longer suit anyone, children want to appear in the image ninja or spider-man. It is not at all necessary to look for carnival in stores costume, which is probably expensive, but you can sew at home yourself.

You will need
- Green and red satin fabric, Velcro, scissors, thread, needle, centimeter tape, foam rubber, green thick fabric for shell, elastic band, landscape sheet, pencil.
Instruction
Make a trapezoid pentagon pattern and apply to the green fabric. Leave some space around the edges.
Fill the rectangle with the trapezoid foam to keep it in shape, and sew on 2 straps with which it will be worn on the body.
On the front side of the straps, sew a rectangle consisting of two identical parts and also stuffed with foam rubber.
Related videos
note
To prevent the foam from coming off, use superglue or sew on a lining. Make the straps on the ties so that you can put on the shell more freely, and then choose the height of the straps for yourself.
The Ninja Turtle costume will look even brighter if you make the shell out of leather. If you remove the shell, you get an ordinary ninja, who still needs to take a weapon with him and the image will be complete.
Belly dance is a mysterious and attractive art that is becoming more and more popular among modern girls who want to perfectly control their body and amaze others with the art of oriental dance. Everyone knows that an essential element dance, without which a complete immersion in his style is impossible, is costume. Costumes for oriental dances cost a lot, but you can sew costume with his own hands, and he will delight you with his originality and uniqueness for a long time.

Instruction
First of all, you need to determine the style. There are many styles costume ov for dance belly, and you need to choose a style based on the type of your figure. The suit should emphasize your dignity.
Skirts suit different shapes different type- it can be a sun skirt, a year skirt (fish style), a flared skirt, a skirt with slits on the sides, and instead of a skirt, you can sew for costume and bloomers. In some styles dance not a bodice with a skirt is used, but a long closed dress.
Bloomers with slits will be a good idea for girls who have a graceful and slim figure. However, the skirt has always been considered universal clothing for dance suitable for any body type. Choose the style of your skirt and the fabric from which you will sew it.
Then select the sewing technology, depending on the chosen style of the skirt. The skirt can be either fluffy or single-layered, with or without a frill, one-piece or with slits. Depending on this, you will calculate the amount of fabric.
No one costume for the eastern dance won't look complete without a richly embroidered belt. For the belt, make a pattern in advance, and according to this pattern, sew a base of dense fabric that will sit well on the figure.
hedgehog image- respectable, solid, solid. Well, if the boy for this costume was not skinny.
Top. Shirt - plain (blue, white, yellow). The vest is colored, with a pattern (you can sew stripes of patterned, even with glitter, braid on a plain vest). For "solidity" under the shirt, you can tie a small pillow or some kind of thickness.
Bottom. Pants - plain or striped, which should be in harmony with the vest and the rest of the suit.
On foot. Elegant "solid" low shoes.
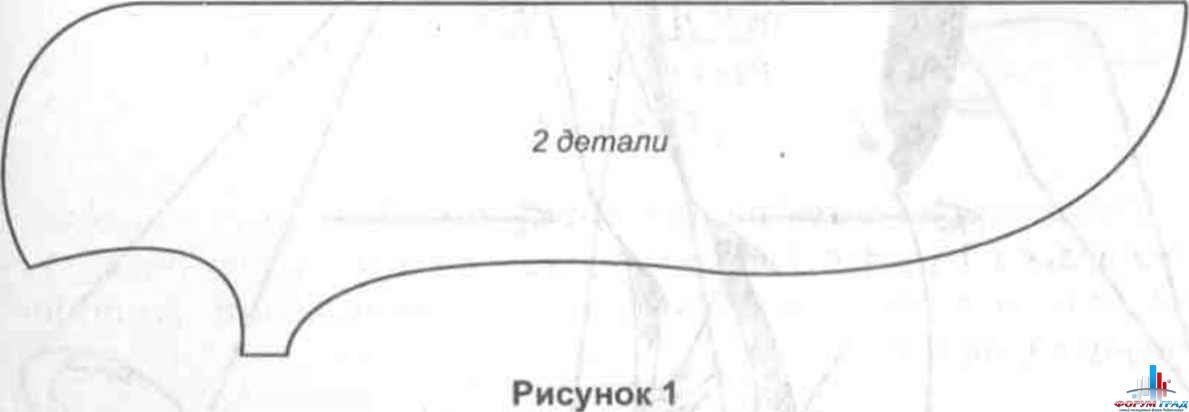
On the head. The hood-cape is sewn from fabric like a baize or cloth of gray color (Fig. 1). If possible, it is better to sew this part on a lining (colors - black, gray, and possibly red or white, if it will be in harmony with the rest of the costume).
Needles- from black plastic bags. Cut and fold the bunts (Fig. 2), glue with universal glue (“Moment”, etc.) and sew the finished cape hood onto the fabric with a wide flattened end. The hood fastens with 2 buttons under the chin. You can fasten a butterfly bow to one of the buttons (after making a loop on it). You can attach a butterfly simply on an elastic band. The color of the butterfly should be - contrasting to the shirt and hood.
Mask- from cardboard (see manufacturing technology in the chapter "Making masks"), but you can do without it. It is glued on top with the same fabric from which the hood is sewn. The nose is a piece of foam covered with black jersey (a piece of old black tights) and sewn to the mask. At the very end of the nose, you can make a mustache. To do this, you need to pass through the nose pieces of thick fishing line. Fix them in the holes so that they do not pull out with glue (from the wrong side). Around the holes for the eyes, you can make a stroke: stick a narrow black inlay or simply circle the holes with gouache with the addition of PVA glue or black ink (Fig. 3).
The mask is attached with an elastic band, and the hood must be put on the mask so that there are no gaps.