The most delicious cutlets Kiev style. Classic chicken Kiev
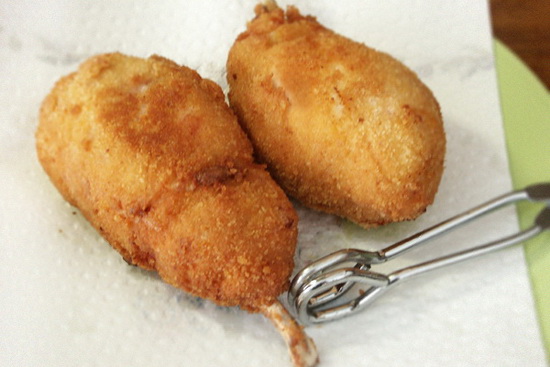
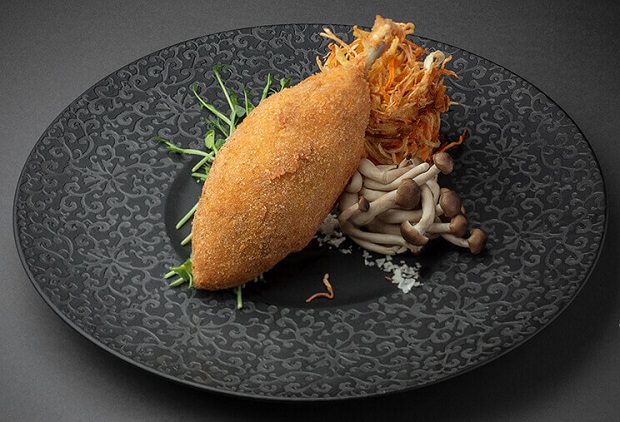
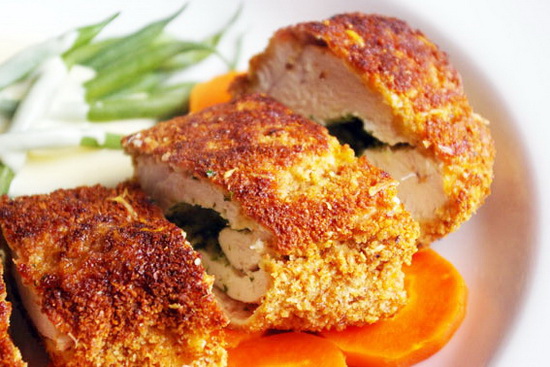
Kiev cutlet attracts culinary gourmets with its appetizing crust, delicate aroma and juiciness. It is classified as a restaurant dish, since cooking the cutlet requires certain skills. It consists of a beaten chicken fillet with a piece of butter wrapped inside it.The finished cutlet has an unusual shape, resembling an ellipse. In the classic recipe, a chicken bone is attached to one end of the cutlet, on which it is customary to put a papillot.
Knowing certain subtleties, it will not be difficult for you to prepare a delicious treat at home.
Secret No. 1: cut the fillet correctly
Cut the chicken fillet with a sharp knife from the thickened edge so as not to cut through it. Make a neat cut and unfold it like a book. Cut a small fillet from each piece (this will come in handy later).
Secret No. 2: beat off the fillet
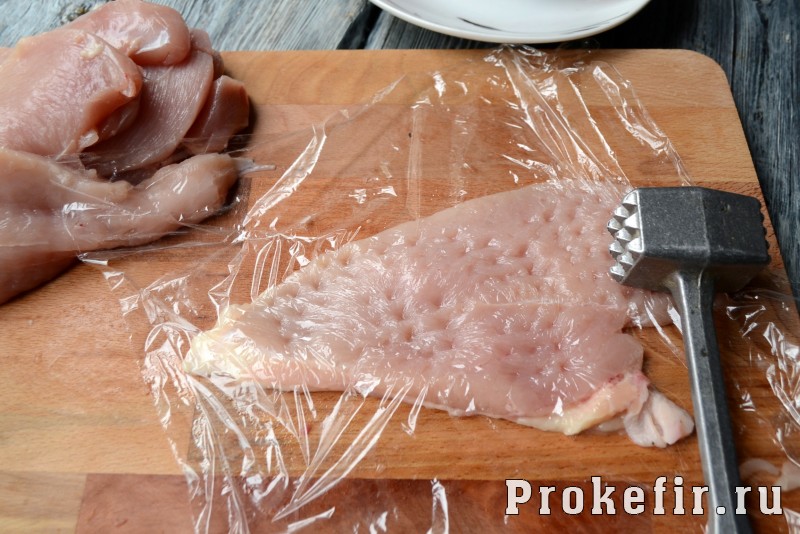
All fillet pieces must be lightly beaten. You should get a uniformly rounded cake. This makes it easier to form cutlets later. In addition, beating will make the finished dish more tender. Use cling film and wrap the fillet to avoid tearing.
Secret #3: butter filling
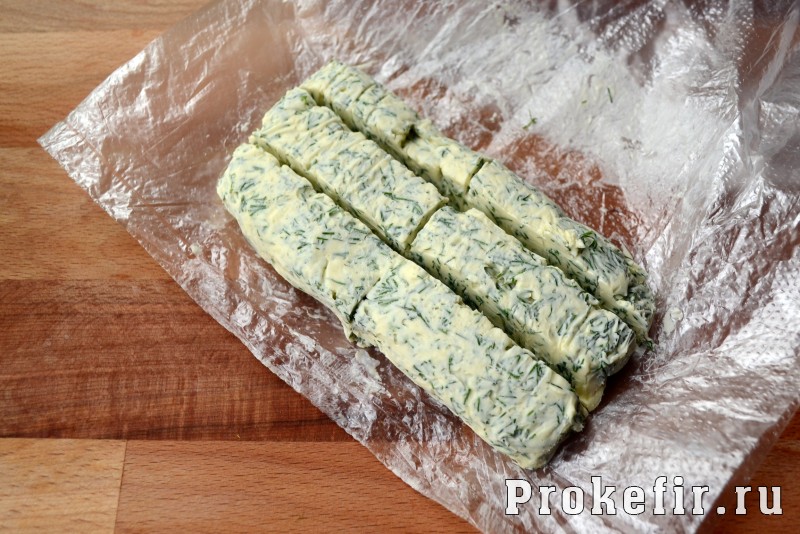
The butter filling is called “green butter”, since chopped, dried dill is always added to it. It is this that gives the dish a unique aroma. There are several ways to prepare the filling: small sticks of butter are dipped in dill or greens are added to softened butter. The filling must be sent to the freezer to harden. If you chose the second method, then place the softened butter on cling film and roll into a sausage shape.
"Green butter" is quite appropriate with other dishes. If you put such a piece of butter on a fish or meat steak, it will imbue them with its aroma. If desired, add chopped garlic to the oil.
Secret No. 4: how to properly wrap a cutlet
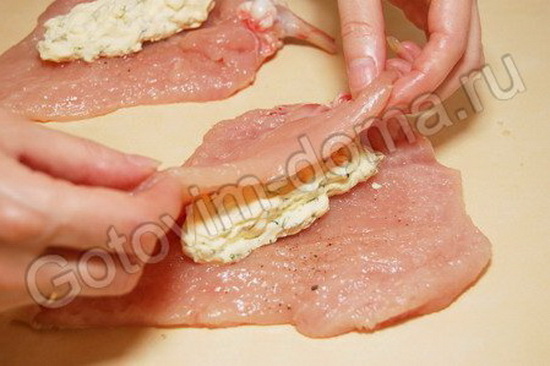
It is important to form the cutlet correctly so that the oil does not leak out of it.Place a frozen piece of butter in the middle of each fillet. Now you will need a small fillet. Cover the top of the butter with it and carefully wrap it in the style of cabbage rolls. The cutlets should be elongated with no gaps.
To prevent the cutlets from losing their shape, wrap them in cling film and place them in the freezer for ten minutes.
Secret #5: double breading
Breading is also a very important step in preparing a dish. It serves as a protective layer against oil leakage, and also as a result of proper breading, you get that delicious crust.For breading you will need flour, eggs and breadcrumbs. Be sure to sift the flour so that there are no lumps.
First dip the cutlets in flour, then in eggs and breadcrumbs. You should not dip it in flour again.
Before breading, be sure to pat the cutlet dry with a paper towel to remove excess moisture.
Secret #6: deep frying
For deep frying, it is preferable to choose refined corn, olive, peanut or sunflower oil. This affects the taste of the finished dish. Poultry or pork fat is often used.
Secret #7: roasting
Heat the oil until it boils. When small bubbles begin to appear, add the cutlets. Fry them for 3 minutes until golden brown. Then they should be placed in a preheated oven (200 degrees) until cooked for 10 minutes. For even cooking, the oil should completely cover the cutlet.
Do not use creamy margarine or butter for deep frying, as they will burn at high temperatures.Make sure that fat does not leak out of the container.Advice
While the meat is cooking in the oven, make French fries or country style potatoes in this deep fryer. Serve it as a side dish for the cutlet.
Chicken Kiev: a simplified boneless recipe
Ingredients (for 2 cutlets):
- Chicken fillet 2 pcs.
- Butter 100 g
- Eggs 2 pcs.
- Dill 50 g
- Flour 50 g
- Breadcrumbs 150 g
- Salt, pepper to taste
- Vegetable oil for deep frying 1 l
Cooking method:
- Immediately make the filling for the cutlets from butter, salt and dill. First wash and dry the dill.
- Mix everything well, form a sausage, wrap in film and place in the freezer (20-30 minutes).
- At this time, wash and lightly dry the chicken fillet. Then cut off the small fillets, and carefully make cuts in large pieces and unfold them in the shape of a book.
- Beat lightly and salt on both sides. Use cling film to protect the fillets from tearing.
- Cut the frozen butter in half and place it in the middle of each piece. Cover with small fillets.
- Carefully wrap on all sides, like cabbage rolls. Make sure there are no gaps anywhere. The cutlets should be elongated.
- Place them in the freezer for 10–15 minutes.
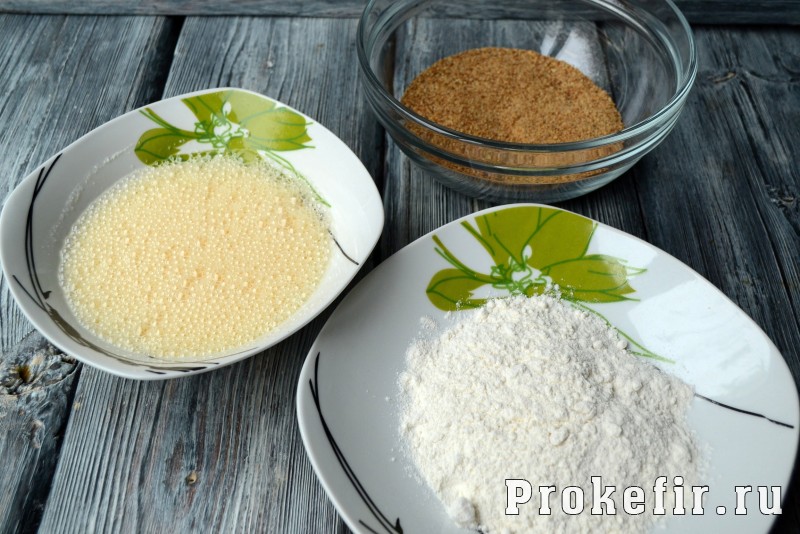
- At this time, place flour, eggs (beat them with salt), and breadcrumbs in separate containers.
- Remove the cutlets from the refrigerator and pat dry with a paper towel. Then start breading. Sequentially, first dip in flour on all sides, then in eggs and breadcrumbs. Do this procedure again. Remember, double breading is reliable protection from oil leakage.
- Pour oil into a deep container, frying pan or casserole, heat it until boiling and fry the cutlets for three minutes to form a golden brown crust. Preheat the oven to 200 degrees and cook them for another 10 minutes.
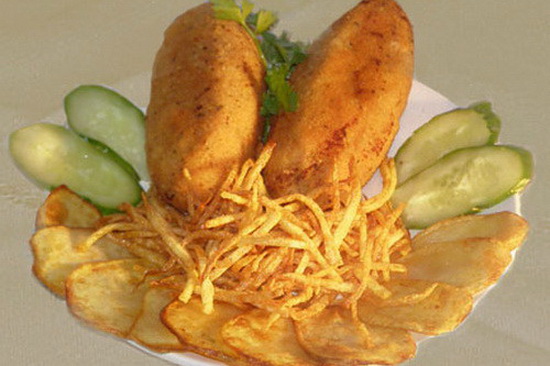
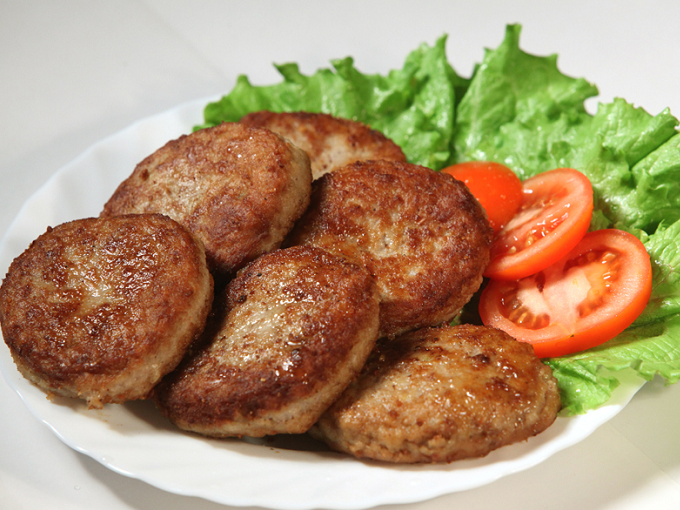
Kiev cutlets are served hot with vegetables, French fries or rice.
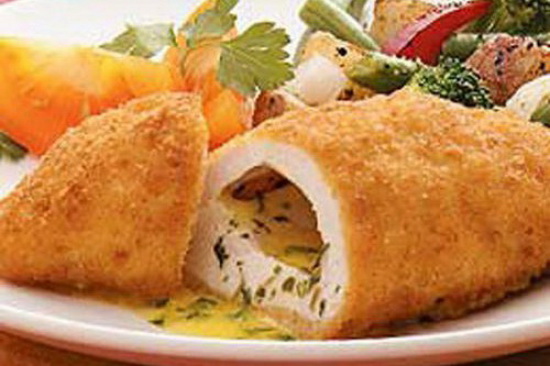
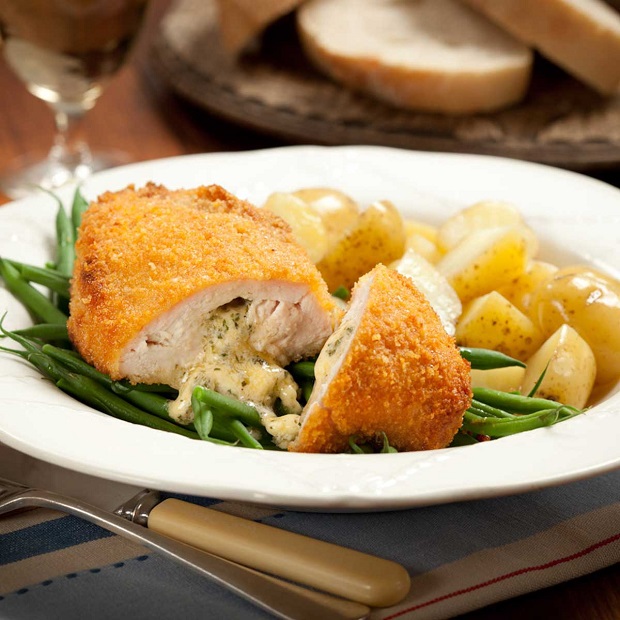
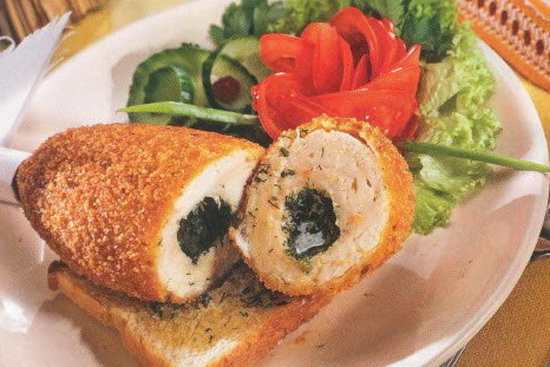
In addition to butter, you can add cheese, mushrooms, and eggs to the filling. The dish is considered properly cooked if, when cut, oil flows out of the cutlet, which gives the dish a unique aroma and juiciness. Bon appetit!
If you want to try something very tasty from chicken fillet, you should make chicken Kiev. The recipe for this dish is known in many countries, so it is often served in restaurants. IN classic version The cutlet is cooked on the bone, but for this you need to have a whole chicken. I suggest making it from boneless chicken fillet.
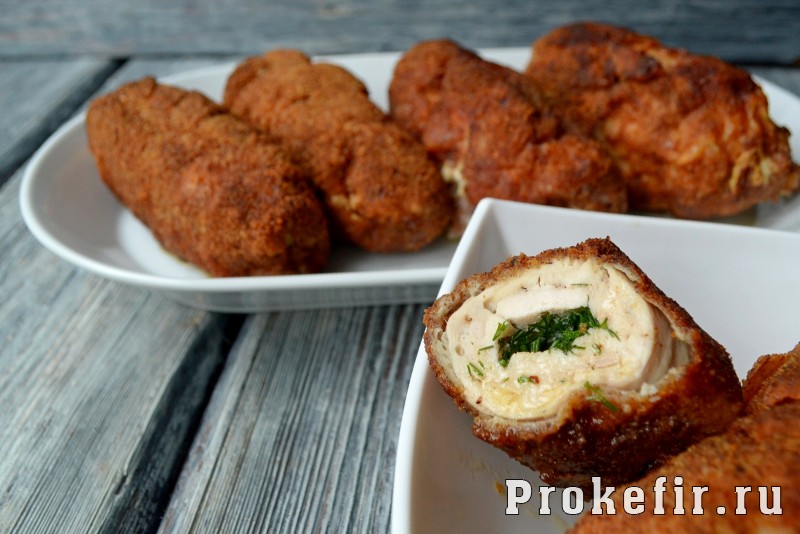
We will prepare festive and very tasty chicken Kiev cutlets from double-breaded chicken fillet; the cutlets will turn out juicy and fried; we will use a piece of butter and chopped herbs as a filling.
The cooking time for the cutlets is 1.5 hours, first we fry them in a frying pan, and then put them in the oven to finish them completely cooked.
Number of servings – 2.
How to cook chicken Kiev cutlets
1. Finely chop a small amount of dill. 
2. Take chilled butter and cut it into cubes. After that, roll them in dill. You can make extra oil with herbs, as we will need it for other dishes as well. 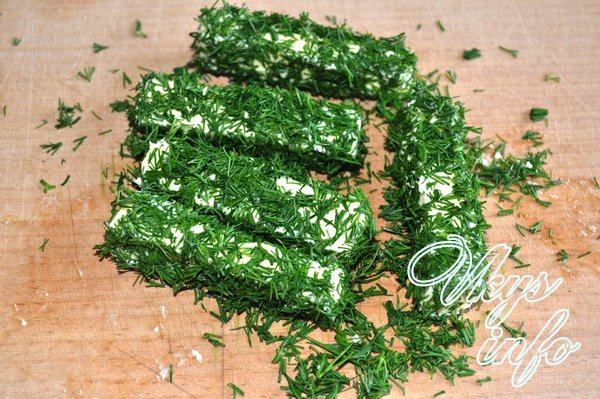
3. We will cook from two chicken fillets, each of which has several parts. Separate a small part fillet from most of it. Excess fat and cut off the film. 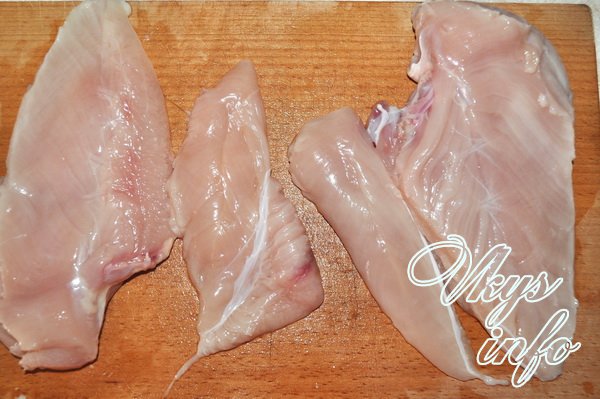
4. Carefully cut the large fillet lengthwise with a knife. 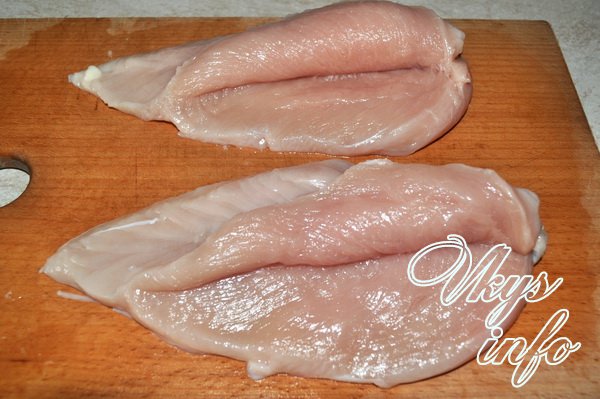
5. We make the cut so deep that you can unfold it like a book. We cut off its lower part (sharp). As a result, we get a semicircular rectangle. 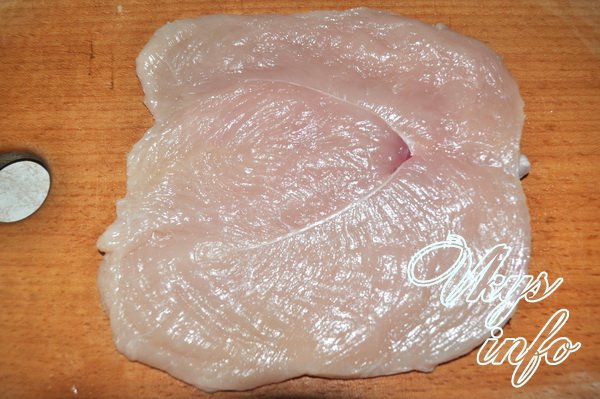
6. Place each fillet between two cling films and beat it carefully on both sides. 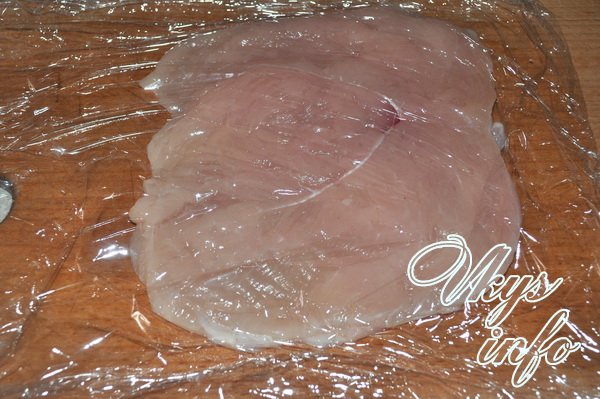
7. Salt and pepper the chopped fillet to your taste. 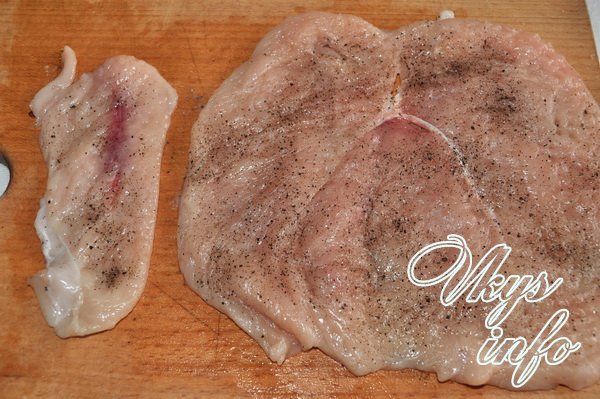
8. Place a stick of butter and herbs on a small fillet.
We wrap it so that it is closed on all sides.
If you find a small hole on a large fillet (although you must try to avoid it), there is no need to worry. We will have the butter wrapped in the meat several times. We will also do double breading. Therefore it should not leak. 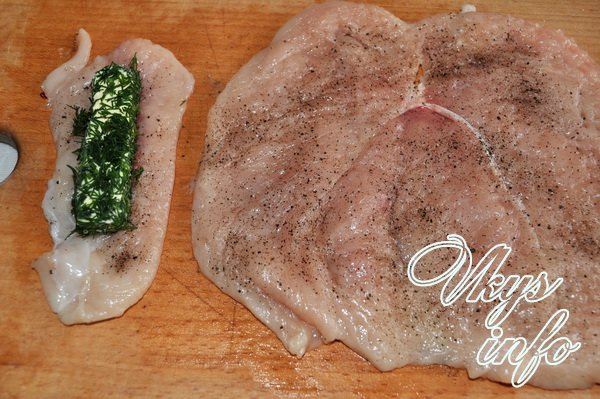
9. Place the small fillet with butter on the large one. 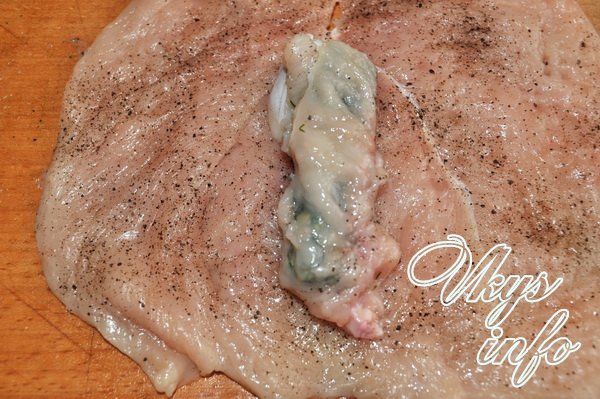
10. Wrap, folding the edges at the top and bottom. If you find any extra (or crooked) parts, you can cut them off. Then chicken Kiev cutlets will turn out more beautiful. 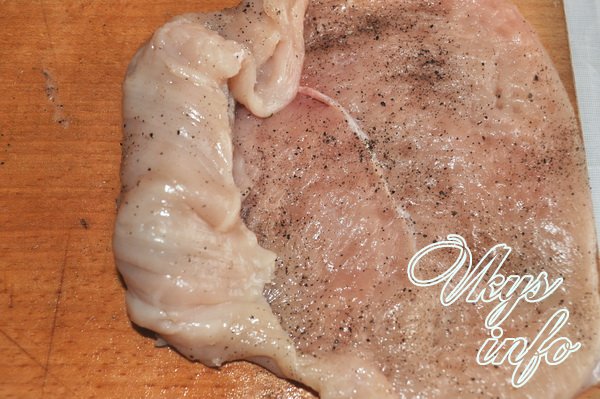
11. Roll it in flour and put it in the freezer for 30 minutes. While the cutlet is cooling, turn on the oven at 200 degrees and let it heat up. Pour vegetable oil into a small saucepan (not to the very edge) and put on fire. 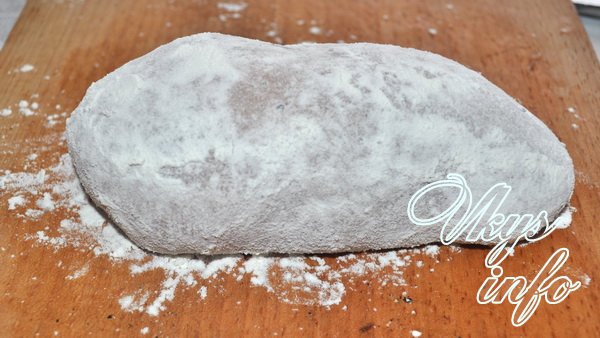
12. Beat two eggs in a separate container. 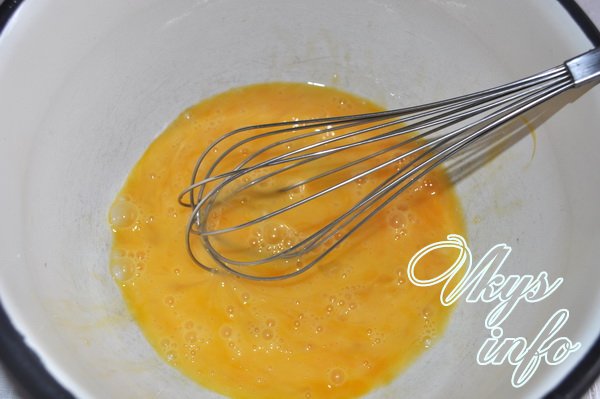
13. When the oil in the pan is hot enough, you can take our cutlets out of the freezer.
Dip them in egg. 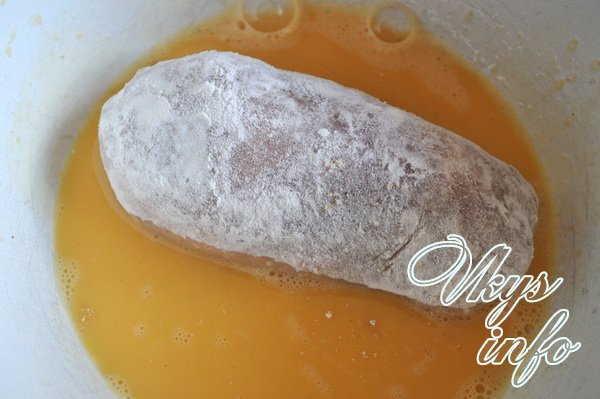
14. After this, roll the cutlets in breadcrumbs. 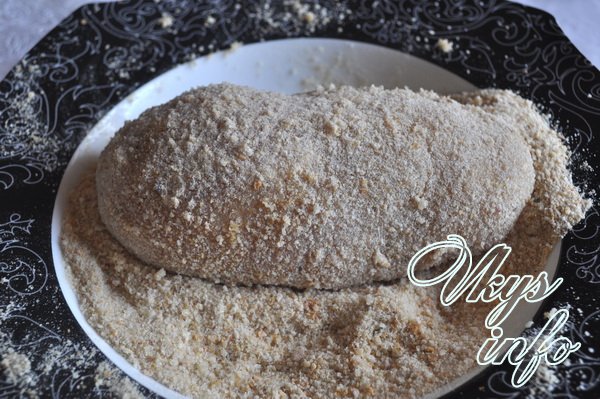
15. Dip it into the beaten egg again. 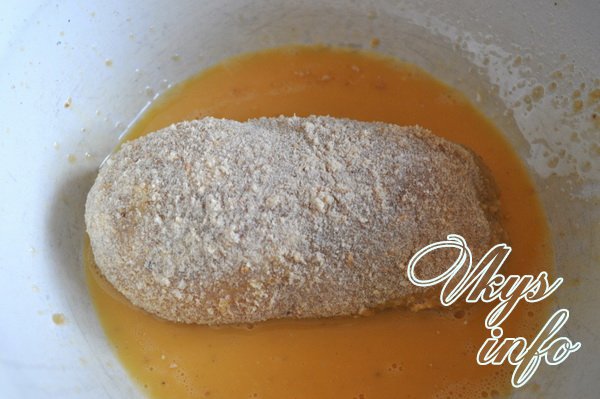
16. For the second time, bread the cutlets in breadcrumbs. 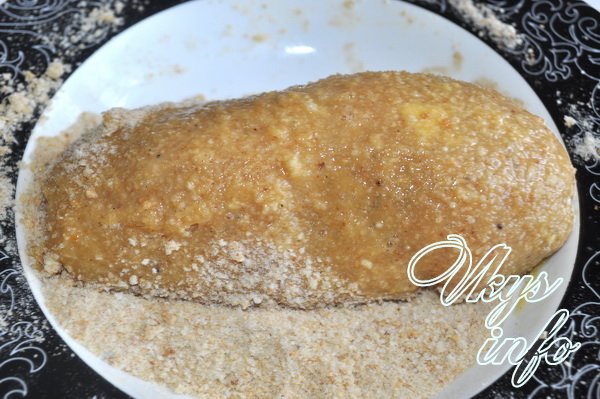
17. Carefully lower into hot oil. It will bubble, so make sure no water gets in there. When the cutlets are browned (after 5 minutes), you can remove them using a slotted spoon. 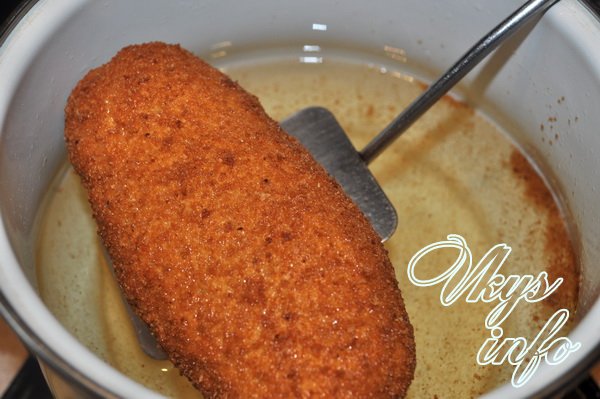
18. Place them in the mold and put them in the oven for 10 minutes. 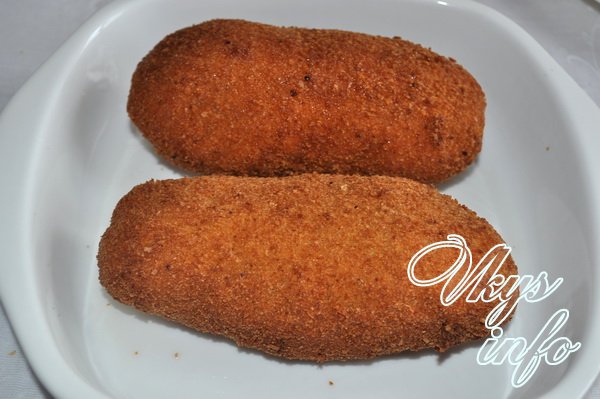
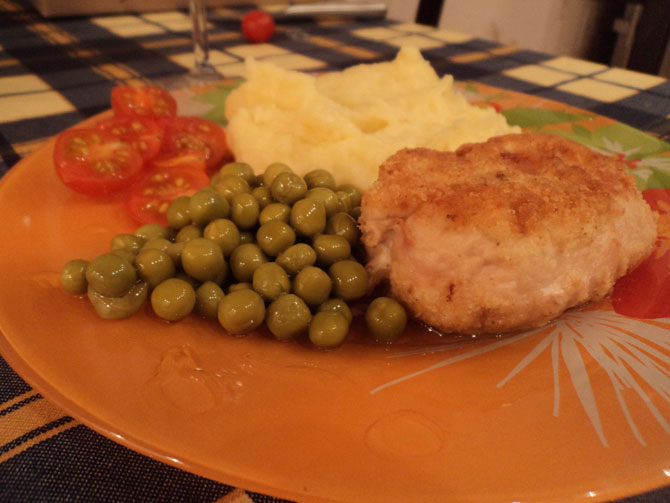
19. Place the finished juicy and at the same time crispy chicken Kiev fillet cutlets on a plate and decorate. They will go great with them vegetable salad, mashed potatoes, rice, buckwheat. 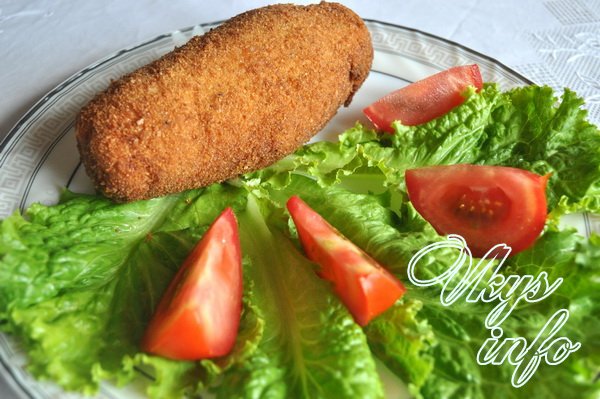
Anyone who has ever tried Kiev cutlets will never forget their original and delicate taste. This dish has become so popular that every housewife has her own recipe, tested on loved ones. But what should you do if you want to cook a dish like cutlet Kiev, the recipe for which has never been tried step by step? Start with original version with photos, and experiment later. After all, cooking is a constant search for new ways to prepare a tasty and interesting dish.
Classic recipe
What are classic chicken Kiev? They are prepared from the most tender chicken fillet stuffed with herbs (dill) and butter (high-quality butter). Seasoning with black pepper or other spices is not recommended.
What do you need to buy?
- 1 medium chicken breast;
- A little breadcrumbs (about 3 tablespoons);
- Flour for the eye (about 3 tablespoons should be needed);
- 2 eggs;
- A little butter;
- Dill;
First of all, prepare the filling - mix dill with melted butter. We form 4 small oval sausages and put them in the freezer.
We cut 4 fairly large pieces from the breast - we will prepare 4 servings. Separately, carefully cut out the internal fillet mignons. We also divide them into halves, we get four pieces. Look at the photo - everything should be clear to you.
We beat the minion carefully, preferably through cling film. Lightly add salt. It is in these pieces that our frozen filling will be wrapped.
Having carefully wrapped, we transfer our stuffed package to the edge big piece and also fold it. We get an oval chicken cutlet with pointed ends.
Place the pieces in the freezer for 5-7 minutes, then form the top crust. First, roll the cutlets in flour, then in eggs and finish with breadcrumbs.
Fry the cutlets in a frying pan and into the oven until lightly browned. Fifteen minutes later delicious dinner ready.
So the classic Kiev cutlet is ready, the step-by-step recipe is quite simple, the main thing is to remember all the nuances.
Cutlet preparation options
Like any dish, chicken Kiev can be prepared different ways- from different varieties meat, from minced meat, with a bone... In fact, in Kiev style - this is a find of Soviet housewives who wanted to make the meat more juicy and came up with the idea of adding a little butter inside the meat.
Modern housewives make their own changes to the time-tested recipe. So, melted cheese becomes a frequent additional ingredient, it gives the tender meat a special zest. Look at the photo - how delicious the cutlets stuffed with cheese look!
The main task in baking such cutlets is to prevent melted butter from leaking out. To do this, they experiment with different layers of breading. If the filling is wrapped in one layer, then the breading should be double.
Classic finishing breading - ground white crackers. Cheese or nuts are sometimes added to them. You can also use crushed crackers.
As you can see, a delicious chicken Kiev, the recipe of which you can change step by step to your taste, is quite a fancy dish. But it almost always turns out delicious.
Chicken Kiev is perhaps one of the most popular and favorite dishes. Juicy, creamy chicken fillet with herbs, breaded in breadcrumbs with a tender and appetizing center will win the heart of any gourmet.
You will need
- for 2 servings:
- 2 chicken fillets
- 100 gr. butter
- dill and parsley
- ground black pepper
- 2 eggs
- 100 gr. breadcrumbs
- vegetable oil for frying
Instructions
Cut the fillet lengthwise to create two pieces - small and large.
Remove the tendons from a small fillet so that the cutlet does not become deformed.
Once again cut the large fillet lengthwise and open it like a “book”.
Place the fillet between two layers of cling film and carefully beat it with a saucepan or frying pan so as not to tear it.
Finely chop the greens. Salt and pepper.
Divide the butter into two cubes and roll in herbs.
Place a stick of butter in the middle of the “book”, close it with a small chopped fillet and wrap it with a large one on all sides, forming a cutlet.
Ready cutlets put in the freezer for 10 minutes.
Beat the eggs.
Dip cutlets into the egg.
Roll the cutlet in breadcrumbs.
Dip in egg again and roll thoroughly in breadcrumbs.
Fry in a hot frying pan with big amount butter until golden brown, 5-7 minutes.
Fried cutlets Place on a baking sheet and put in the oven.
Bring to readiness at 180 degrees for 10 minutes.
Ready cutlets Serve with a side dish of potatoes and vegetables.
Video on the topic
It is believed that the Kiev cutlet recipe was brought from France specifically at the request of Elizabeth, who loved French dishes. The original name of the dish was cutlet de volai. Then everything French went out of fashion, the cutlets were renamed “Mikhailovsky”. And only after some time the almost forgotten recipe was used again. Many people have tried cutlet Kiev, mainly as a catering dish. But you can cook it at home, it will turn out no less tasty.
Related articles:
- How to deliciously cook chicken Kiev
- Chicken Kiev with a complex vegetable side dish
- How to quickly and tasty cook beef
You will need
- – Chicken breasts – 500 g
- – Garlic – 2 cloves
- – Eggs – 2 pieces
- – Butter– 100 g
- – Breadcrumbs, flour
- – Salt, pepper, oil
Instructions
Finely chop the garlic and add it to the softened butter. Add a little salt and pepper, you can add your favorite spices or buy ready-made seasoning for chicken. Then thoroughly knead the butter until smooth and place it on foil in the form of a small oblong sausage. Wrap in foil and place in the freezer for 20 minutes.
You can purchase a whole chicken at once; you can only use chicken breasts. The meat should be cleaned of films, fat and skin. Then wrap the breast in cling film and beat thoroughly. You need to beat with the side with small teeth and make sure that there is no hole in the fillet. You can sprinkle some spices on it, then put a piece of frozen butter in the middle. Cover the piece with the smaller fillet and carefully wrap it, giving the cutlet an oval shape. The oil should not be visible.
Then pour 2 eggs into a bowl, add a little salt and beat thoroughly until smooth. Dip the resulting cutlet in the egg mixture, then in flour. Then again in egg and breadcrumbs. If it seems to you that the cutlet is unevenly covered with a layer of breadcrumbs, you need to repeat the last step.
Then place the cutlet in hot oil, which should cover it approximately halfway, and fry until golden brown.
Helpful advice
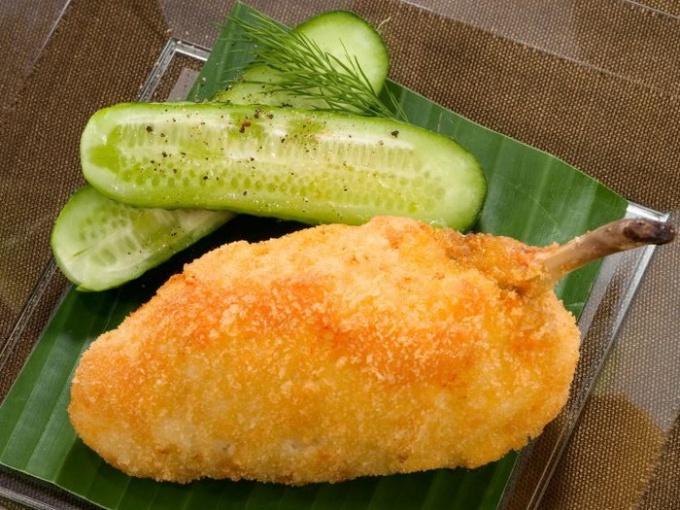
Serve the finished cutlet with a side dish and garnish with herbs.
How to cook chicken Kiev with butter
Perhaps the most common dish, which is sold in every supermarket and fast food kiosk, is chicken Kiev. She is good in any form. But what kind of store-bought cutlet compares to a homemade one, especially if you know how to cook? This dish is quite easy to prepare, so let's try to make it.
Related articles:
- How to cook chicken Kiev with butter
- How to deliciously cook chicken Kiev
You will need
- For 4 servings:
- Chicken fillet – 4 pcs.
- Egg – 1 pc.
- Flour – 100 g
- Milk – 0.1 l
- Breadcrumbs – 100 g
- Butter – 100 g
- Sunflower oil – 300 g
- Salt - to taste
- Ground black pepper - to taste
- Greens - to taste
Instructions
We wash the fillet under running water and dry it with a paper towel.
While our fillet is marinating for a short time, beat 1 egg and mix it with flour and milk.
Now take each fillet and place a piece of butter in it, rolling it up so that the butter is inside. For reliability, we fasten with a wooden toothpick.
Roll the future cutlet first in batter, then in breadcrumbs. The breading should be in a fairly thick layer.
We will need a frying pan with high edges. Pour sunflower oil into it. You need a lot of it in this recipe; when immersing, the cutlet should be at least half closed.
Well, we have a frying pan on fire, now we wait for the oil to boil. Place the cutlets in boiling oil and fry over low heat for quite a long time. The breading should become dark golden brown.
When the cutlets are fried, take them out onto a paper towel to drain off excess fat.
Don't forget to remove the toothpicks and sprinkle with finely chopped herbs.
Video on the topic
note
There is a danger that the chicken will remain raw, so fry longer.
Helpful advice
Only parsley and dill should be used in this recipe. The breading should be white breadcrumbs.
Kiev cutlets first appeared in Russia under Empress Elizabeth. The recipe for the dish was brought from France, it was called “de-volley”. After Patriotic War In 1812, these cutlets were renamed Mikhailovsky. But the chicken bone in cutlets, imitating a leg, first appeared in Kyiv restaurants. Try preparing this wonderful dish using a slow cooker.
Recipe for Kiev cutlets in a slow cooker
Prepare the following ingredients for the dish: 300 g fresh chicken breast, 40 g butter good quality, 2 eggs, 100 g crackers, 100 g flour, 40 g hard cheese, dill, white pepper, salt.
Trim the fillet from the breast. To do this, make a deep cut along the breast bone and cut off the fillet along with the wing. Cut the bone from the meat. Remove meat and skin from it. Cut off top part fillet, remove white veins, films and fat. Beat the pieces with a special hammer to a thickness of 0.5 cm. Grate the cheese. Mix soft butter with cheese, pepper, salt and dill and place in the refrigerator to set.
Salt and pepper the pieces of meat. Put the filling in them. Form oval sausages and thread them onto the chicken bones. To do this, place the bones in the middle of the prepared fillet. Wrap the fillet very tightly to prevent the filling from leaking out during cooking. Place the formed cutlets in the freezer for a few minutes.
If the cutlet does not curl and liquid leaks out, cover the hole with a piece of beaten meat.
Prepare the breading. Beat the eggs. Remove the cutlets from the freezer, roll them in flour, then in the egg, then in breadcrumbs, then again in the egg and again in breadcrumbs. The cutlets should have a thick layer of breadcrumbs. Fry Kiev cutlets in a multicooker in the “Baking” mode with plenty of oil. The oil should cover the cutlets at least halfway through. After 15 minutes they need to be turned over. To ensure that the filling is evenly distributed throughout the cutlet, after finishing the cooking program, leave the dish in the multicooker for 5 minutes.
Chicken Kiev with mushrooms in a slow cooker
For Kiev cutlets with mushrooms, take 300 g chicken breast, 200 g champignons, a little parsley, 40 g butter, 2 eggs, vegetable oil, pepper, breadcrumbs, flour, salt.
Finely chop the mushrooms and fry them in oil. Cool them and mix with finely chopped parsley and soft butter. Put ready mixture in the refrigerator. Prepare the fillet, pound it with a hammer, salt and pepper. Spread the butter and mushroom mixture over it and wrap tightly.
To prevent the filling from leaking out, but to remain inside the cutlet, wrap it first in a very thin piece of chicken, and only then in the chop.
Place the cutlets in the freezer for a few minutes. Beat the eggs. Remove the cutlets from the freezer, roll them in flour, in egg, in breadcrumbs, again in egg and again in breadcrumbs. Pour oil into a slow cooker and heat it up. Lower the cutlets into the oil using a slotted spoon. Set the “Baking” mode for 30 minutes, after 15 minutes turn the cutlets over. Remove the finished dish and serve.
The Kiev's cutlets
Cutlets with a surprise inside - ham and cheese-garlic sauce, a favorite treat for the whole family. Serve with a green salad or steamed broccoli.
You will need
- – 4 chicken breast fillets;
- – 30 g flour;
- – 300 g breadcrumbs;
- - 3 eggs.
- For filling:
- – 30 g butter;
- – 30 g flour;
- – 150 ml milk;
- – 50 g Cheddar cheese;
- – 50 g ham;
- – a clove of garlic;
- – 10 g parsley leaves.
Instructions
Beat the eggs in a separate bowl. Finely chop the ham, chop the parsley, and crush the garlic cloves.
Preheat the oven to 190 degrees. For the filling, melt the butter in a saucepan, add the flour, stirring, and cook for 1 minute. Remove from heat and add milk. Grate the cheese into the pan and return to the heat. Bring to a boil, stirring until the mixture thickens. Add ham, garlic and parsley, stirring. Remove from heat.
Place the chicken pieces between two sheets of film and beat well. Spoon the filling into the center of each piece. Fold in half, completely covering the filling.
Place the flour and breadcrumbs in separate bowls and the beaten eggs in a shallow bowl. Roll the chicken first in flour, then in the egg, and then in breadcrumbs. Dip again into the beaten egg and roll in breadcrumbs again.
Place the chicken cutlets with the surprise inside on a baking sheet and bake in the oven for 40 minutes until golden brown.
Video on the topic
Helpful advice
You can replace the parsley with a tablespoon of chopped fresh tarragon.
Cutlets in a slow cooker - quick dish without hassle and oil splashes. It doesn’t matter what you use or how you prepare it, it will turn out tasty and even healthy. Try a recipe for hearty fried meatballs made from two types of meat, bake fish croquettes or make diet steamed turkey cutlets.
Fried meat cutlets in a slow cooker
Ingredients:
– 300 g each of pork and beef;
– 1 onion;
– 2 potatoes;
– 1 chicken egg;
– 100 g breadcrumbs;
– a pinch of ground black pepper;
– 1 tsp. without a hill of salt;
- vegetable oil.
If you beat the minced meat a little, the cutlets will be denser and more elastic. To do this, drop it several times on the table from a height of 40-50 cm.
Rinse the meat, dry it, remove films if necessary and cut into cubes. Peel the onion and potatoes and cut them into quarters. Pass the prepared ingredients through a meat grinder. Add egg, pepper, salt to the resulting mass and mix the minced meat thoroughly until smooth with your hands. Divide it into portions the size of Walnut, roll each into a ball, press a little and roll in breadcrumbs. Pour vegetable oil into the multicooker bowl, set the “Baking” mode and slightly warm the container for 2 minutes. Place the meatballs in it, close the dish with a lid and fry the cutlets for 8 minutes on each side until a crust appears.
This chicken breast Kiev recipe is incredibly popular. Every second restaurant in Kyiv considers it their duty to include this dish on the menu. There are several explanations for this. First of all, this dish is very tasty - crispy thin crust, soft juicy chicken inside and melted butter with fresh herbs that flows out when cut - it even sounds like music.
Secondly, the reason for its popularity is that you use a whole chicken fillet as the main ingredient, and the Kiev cutlet does not include any unnecessary additives such as fatty lard, cheese or high-calorie mayonnaise for taste. Due to the fact that chicken fillet is not ground, it will retain all the juiciness and usefulness of the protein product for the body.
The history of the Kiev cutlet is complex and confusing, since even Americans attribute the origin of the dish to their country, considering the name “Chicken Kiev”, or “Chicken Kiev”, to be a word of emigrants from Ukraine.
Ukrainians claim that these chicken cutlets came to them in 1918, but did not achieve popularity. And only in 1947, during a banquet in honor of the return of the Ukrainian delegation from Germany, everyone liked the recipe for making Kiev cutlets and the dish quickly entered the restaurant menu. The originator of this dish was the French chef, wine merchant and pastry chef Nicolas Appert, who invented “côtelettes de volaille,” juicy chicken breast cutlets.
How to cook chicken Kiev at home - recipe with photos step by step
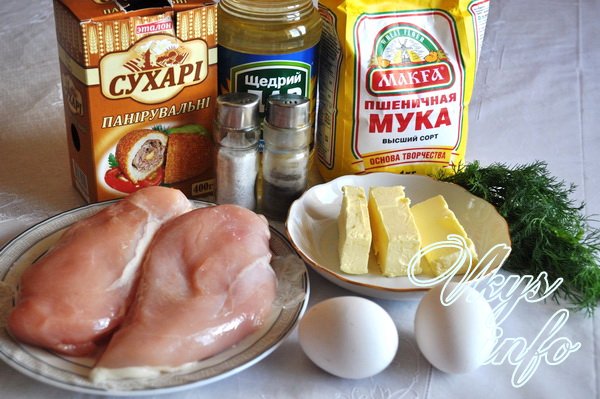
Ingredients
- Chicken breasts - 1 kg (3 fillets)
- Butter - 100 g
- Salt - 1 tsp. Spoon
- Black pepper - to taste
- Dill - 1 bunch
- Breadcrumbs - 100 g
- Flour - 100 g
- Egg - 2 pcs.
- Kefir - 2 tbsp. spoons
- Vegetable oil - for frying, approximately 300 ml
Cooking time 25 minutes + 20 minutes for frying and 10 minutes for baking
Yield: 6 pieces
So, let's start preparing chicken Kiev. Step by step recipe with a photo, he will tell you how to cook a hearty restaurant-quality dinner for six from a kilogram of chicken fillet. The cooking process is simple and straightforward, the products can be easily purchased at the supermarket or taken from the kitchen shelf, it will not take much time, and the result will surpass the efforts.
Prepare all ingredients for chicken Kiev. The recipe assumes that you will cook from fresh chilled fillets, and not frozen ones, since when defrosting, the juices contained in the meat will leak out and the cutlets will be dry. Kiev cutlets are traditionally prepared from a chicken carcass, but if for some reason you cannot use chicken meat, you can make Kiev cutlets from minced pork.

First of all, you need to prepare the tender core of the Kiev cutlet. It is this that melts during frying and baking, making the inside of the chicken fillet juicy and aromatic and creamy. Mix soft butter with finely chopped dill in a deep bowl. If the butter is frozen, just from the refrigerator, heat it for 30 seconds in the microwave on medium power.

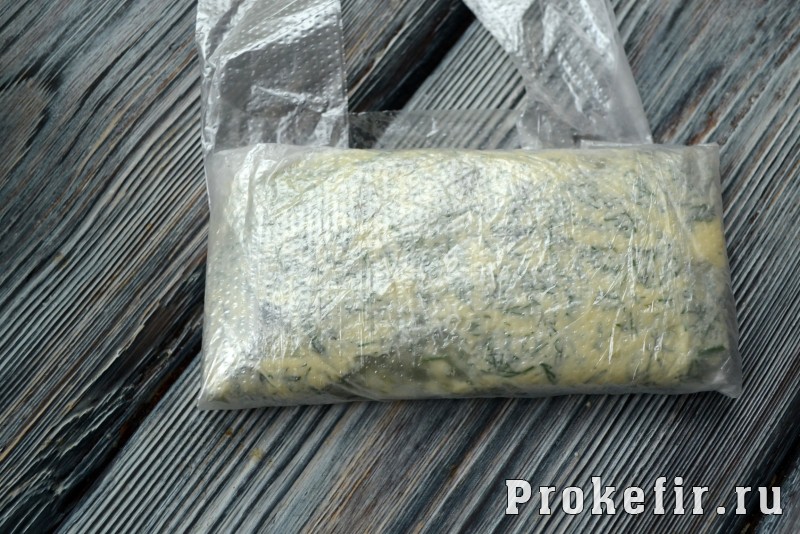
Then spread it out on a flat surface plastic bag or cling film and place all the oil and dill in the form of a rectangle on the bag. Wrap it so that the butter forms into a stick. Place in the freezer for 40-50 minutes so that the butter freezes well, because in the recipe for Kiev cutlets at home it will be our delicious filling.
Let's move on to the main ingredient of chicken Kiev. Classic recipe involves cooking Kiev cutlet on the bone, but many cooks prepare boneless cutlet, from pure fillet. We will do the same, especially since the bone performs a purely decorative function and does not affect the taste at all.
Before preparing chicken cutlets, select fillet pieces. The meat should be of good quality, practically odorless, and soft pink in color. It is better if the fillet and, as a result, all the cutlets are the same size, so they will fry evenly in the pan.
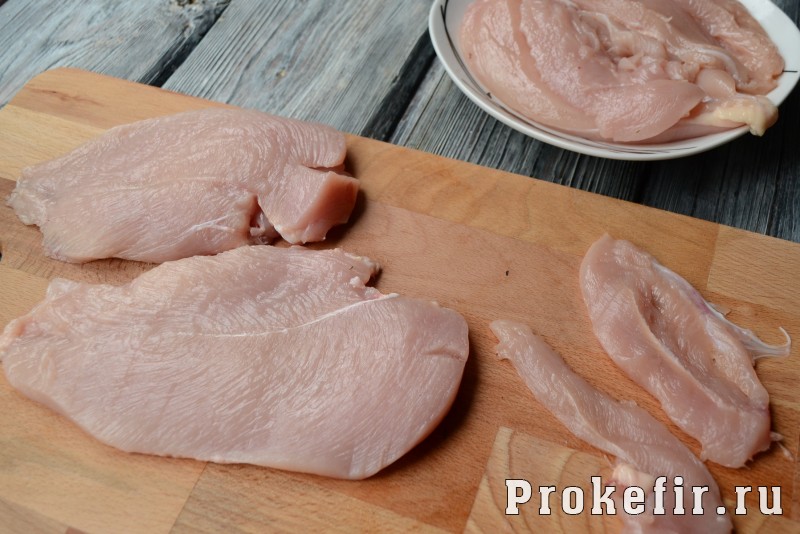
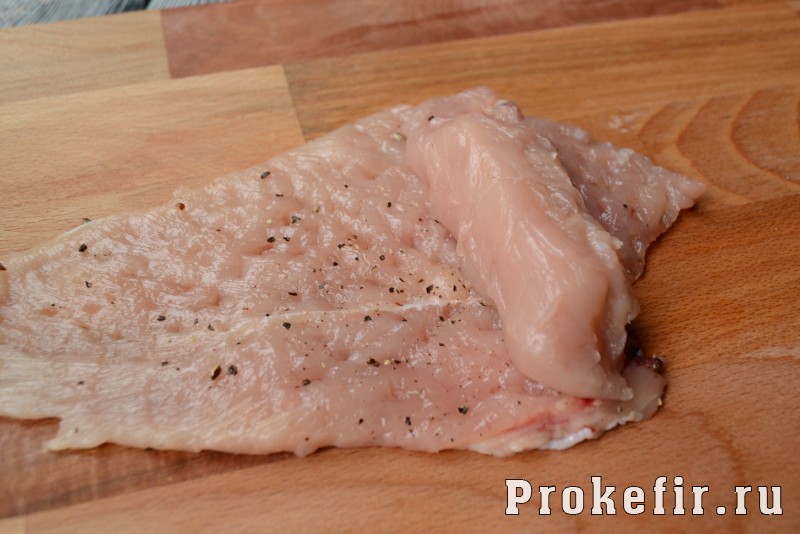
First, cut a small fillet and cut it lengthwise into two pieces. Then use a sharp knife to divide the remaining large fillet into two, also cutting lengthwise, parallel to the table. Thus, from three fillets you will get six preparations for chicken Kiev cutlets - six large and six small.
Place a large chicken fillet on the board, cover it with cling film and beat it a little. Try not to tear the fillet; if there are holes, the filling will leak out through them during frying. The thickness of the meat should be 5-7 mm.
Prepare all the ingredients for the chicken Kiev batter. Break the eggs into the first bowl and add kefir. Stir and add a little salt. Pour flour into a second bowl (it is better to sift it before doing this). You can use white bread instead of flour as a breading for chicken Kiev, finely crumbling it into a bowl. Place breadcrumbs in a third bowl. I use store-bought crackers, but you can make your own by grinding stale bread in a blender.
Remove the chicken Kiev filling from the freezer. Recipe with step by step photos The fillet is designed for six cutlets, so we divide the filling into six cubes. Make sure the stick of butter is no larger than the width of a large chicken fillet.
Now we’ll show you how to wrap cutlets Kiev style. To ensure that the result does not disappoint you, it is very important to properly wrap the chicken Kiev, and the recipe will tell you step by step with photos how to do this. Place a large fillet on a cutting board. Place a block of frozen butter with dill on its wide part. By the way, if you put a piece of processed cheese instead of our butter filling, you will get very tasty chicken Kiev with cheese, which, when cut, will melt appetizingly inside the cut cutlet.
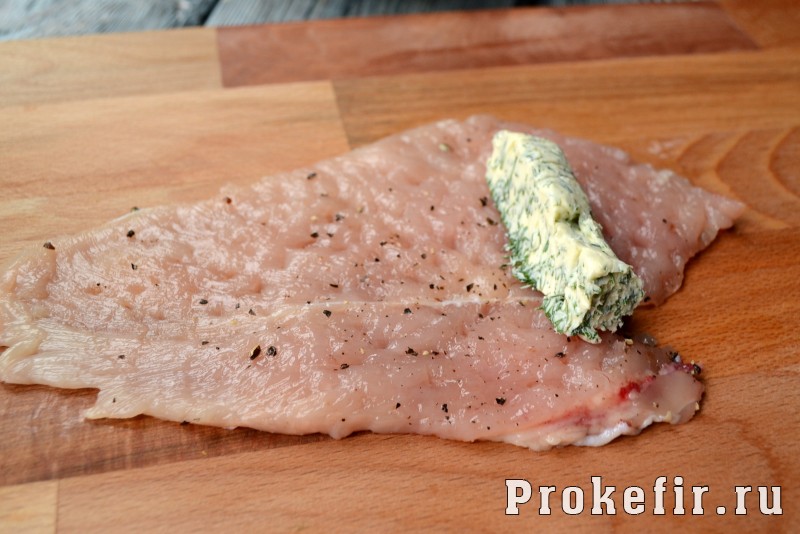
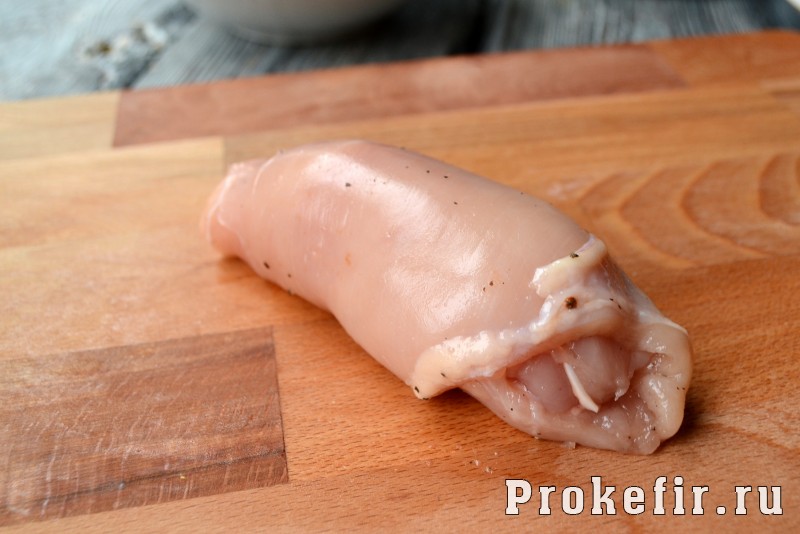
Salt and pepper the chicken fillet over its entire surface. Cover the stick of butter with small chicken fillet, wrap the edges under the block, making a pocket.
Now, from the wide edge, wrap the cutlet into a roll so that all our butter filling remains inside the cutlet. In order not to think at the end why the Kiev cutlets are dry, we need to properly hide our oil in the layers of meat so that it does not leak out ahead of time.
So, there is a way to make chicken Kiev tasty and juicy. This is the answer to the question why Kiev cutlets are double-breaded. There are housewives who do not bread the cutlets at all before frying or baking. This is a very big mistake, because it is thanks to the dense, thick breading made from several layers that the juice remains inside the meat and the result turns out much better and tastier.
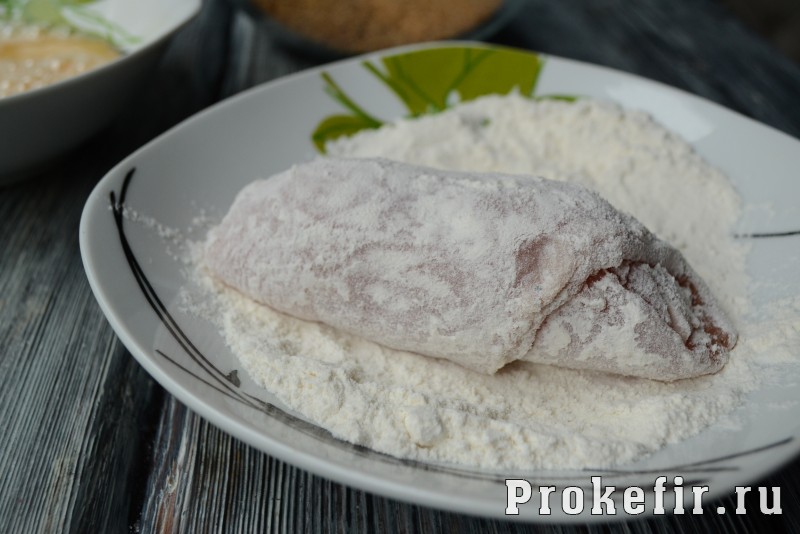
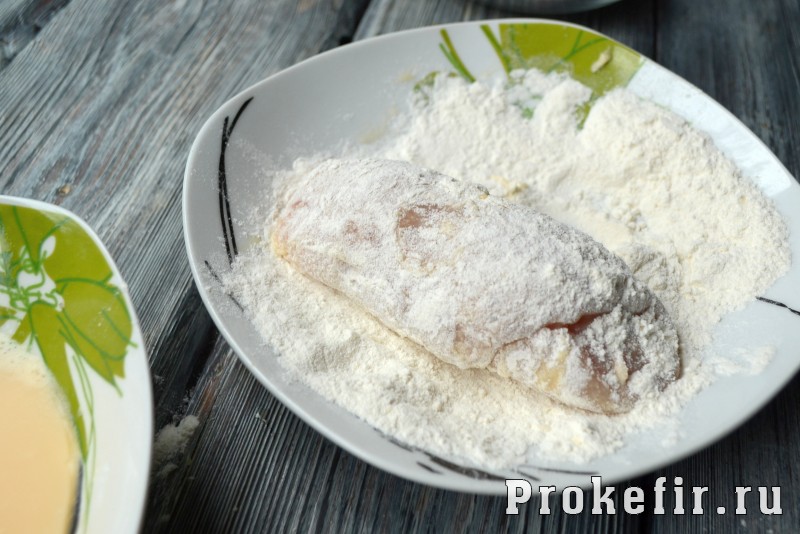
Dip the formed cutlet into flour, rolling it on all sides.
Then carefully transfer the floured cutlet into the egg and kefir mixture, wet it on all sides so that the liquid covers the entire surface of the cutlet.
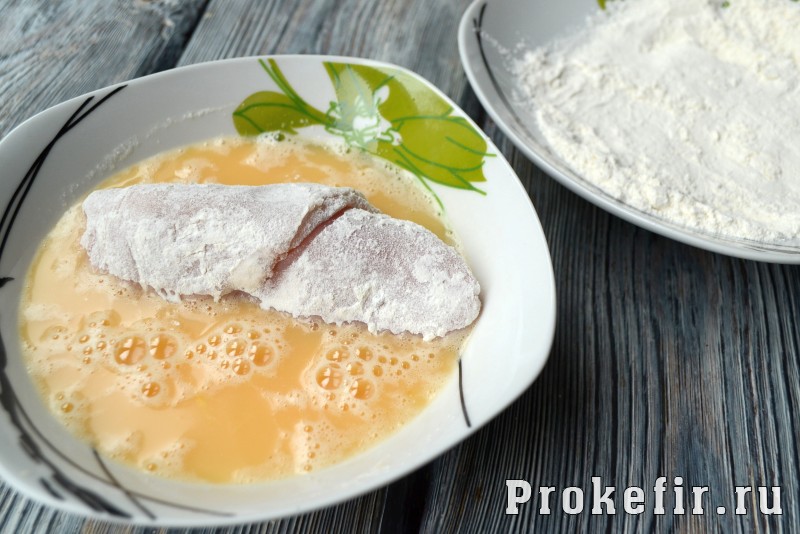
Immediately transfer the Kyiv chicken breast cutlet back into the flour, this way we achieve that same double breading, thanks to which the crust will be crispy and the chicken meat juicy. Then again transfer the product to the egg and kefir, moistening it on all sides.
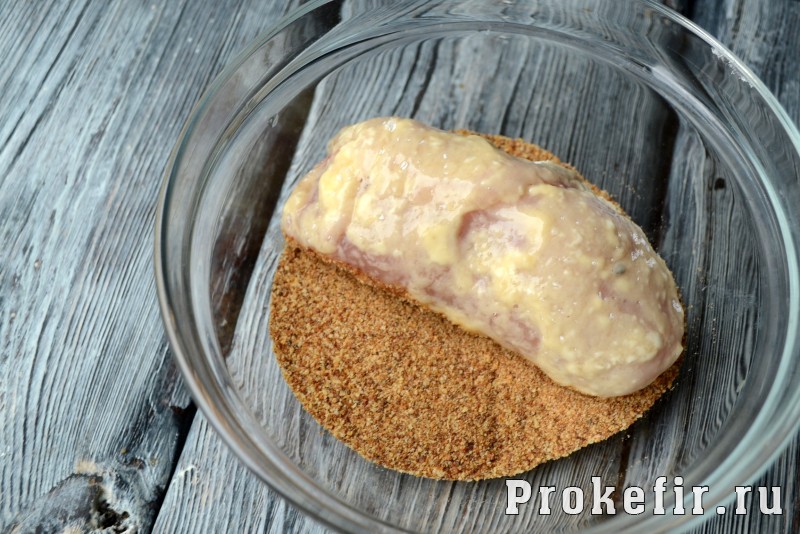
And the last stage of breading - roll the cutlet in breadcrumbs. By the way, you can make your own breadcrumbs for chicken Kiev from bread. To do this, cut and dry the bread crusts, then place them in a blender and grind into crumbs. Roll in breadcrumbs thoroughly on all sides.
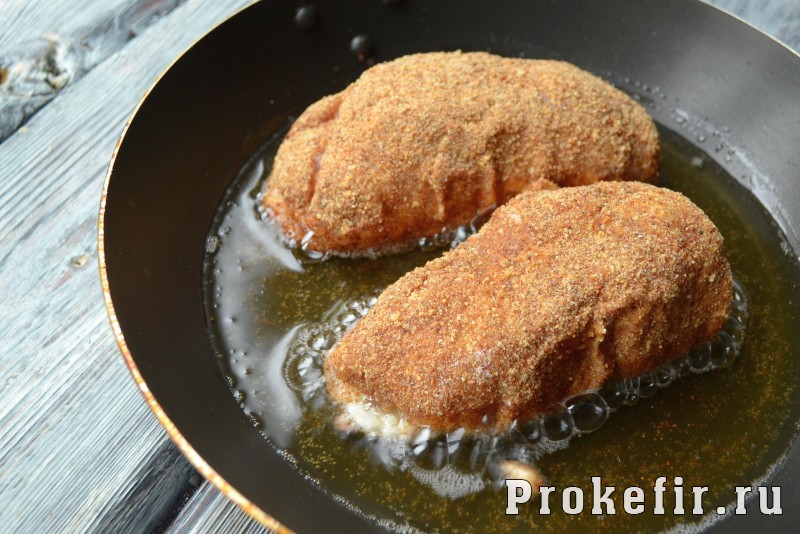
So, how to fry chicken Kiev in a frying pan? Heat a frying pan with plenty of oil until the chicken cutlets are submerged about halfway in the oil. Fry the cutlets on one side, without reducing the heat under the frying pan, until a beautiful golden brown crust forms, then turn the heat down a little, turn over and fry for a few more minutes, then turn over to the third side, after the crust has formed, turn the cutlet over again and fry until browned. How long to fry chicken Kiev? In total and depending on the size of the cutlets, the entire frying process takes 10-15 minutes.
Carefully place the cutlets fried on four sides on a baking sheet with a non-stick coating and place it in an oven preheated to 190-200 degrees for 10-15 minutes. This way you will bring the chicken meat to readiness, even if it is unevenly fried somewhere in the pan. You can both fry and finish Kiev cutlets in a multicooker using the “Frying” and “Baking” modes.
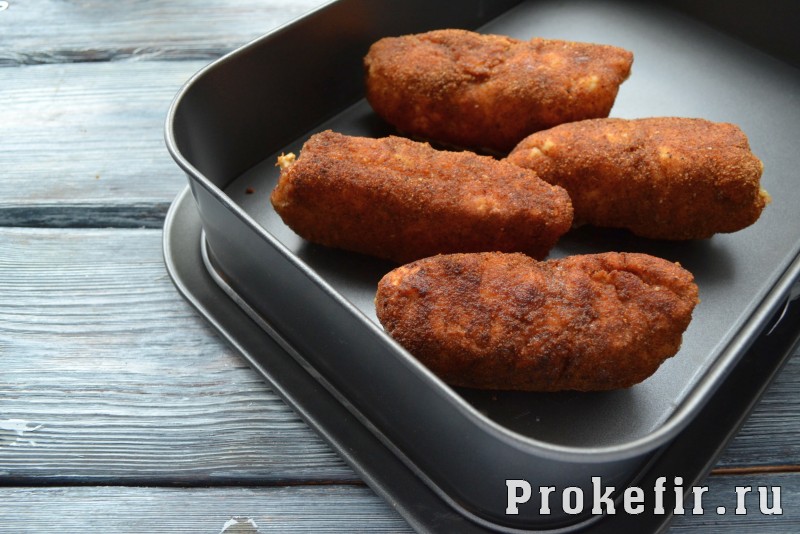
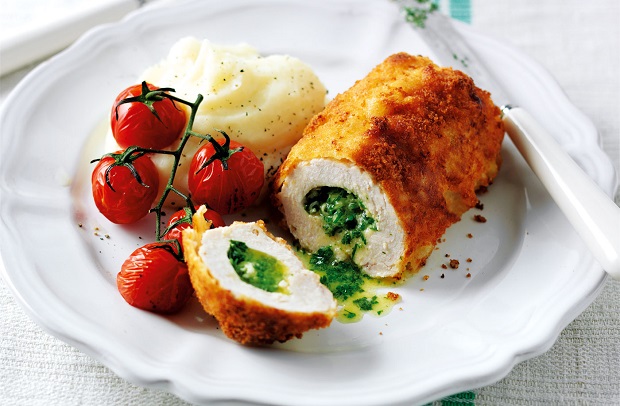
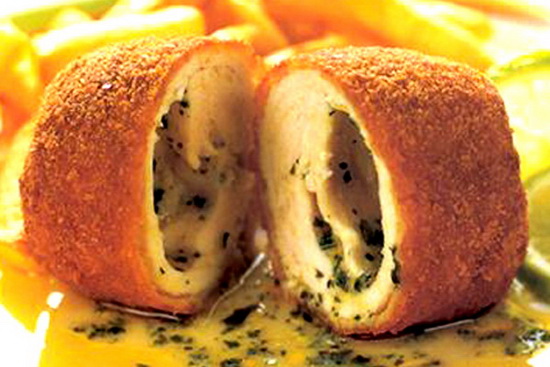
After the cutlets are removed from the oven, serve them immediately. As you can see in the photo, when you cut the cutlet, the middle, consisting of melted butter and fresh herbs, pours out appetizingly.

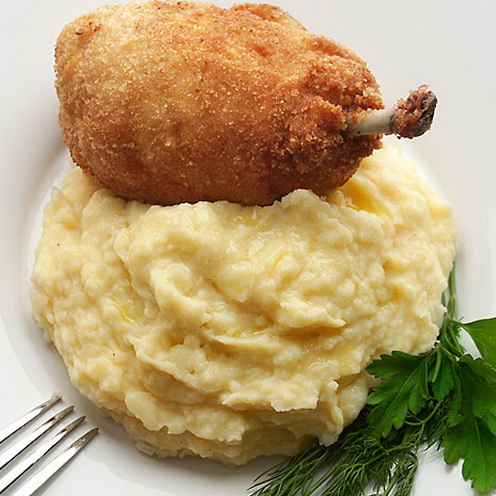
Serve as a side dish for chicken Kiev fresh vegetables and your favorite sauce. Any sauce for Kiev cutlets is suitable - ketchup, adjika, or barbecue sauce and satsebeli. A potato side dish, served in the form of mashed potatoes or fries, is also considered traditional.
Is it possible to freeze chicken Kiev for future use?
If you find that the number of cutlets you got after formation is too much for your family, do not rush to fry them. After all, if the finished cutlets stand, they will partially lose their taste characteristics - the breading will no longer be crispy, and the melted butter will be absorbed into the chicken meat and will no longer leak out when broken.
Therefore, before frying chicken Kiev, I recommend freezing some of them in the freezer of your refrigerator. I think there is no need to answer why Kiev cutlets are stored in the refrigerator - raw meat needs to be frozen to stop possible reproduction harmful organisms. You can always take them out and prepare a wonderful dish for dinner in 20-25 minutes, with virtually no effort.
How to fry chicken Kiev - semi-finished products in a frying pan
Remove the frozen Kiev cutlets that you previously prepared for your freezer from the freezer. There is no need to defrost them; you can immediately place them in a well-heated vegetable oil in a frying pan and fry over low heat under the lid a little longer than regular Kiev cutlets made from fresh chicken fillet.
Is it possible to bake chicken Kiev in the oven without frying?
You can bake breaded cutlets immediately in a very hot oven, bypassing the frying stage. Of course, you will need much more time, as if you were cooking already fried cutlets, and you will not get such a crispy crust. Of course, chicken Kiev in the oven without frying is much lower in calories and more healthy.
How many calories are in a Kiev cutlet?
100 grams of ready-made cutlets prepared in the classical way contain 245 kcal. How many carbohydrates are in a Kiev cutlet? If you use a breading of flour, eggs and wheat breadcrumbs, then the composition of the cutlet is as follows: Fat - 16.91 g, carbohydrates - 9.52 g, proteins - 13.31 g.
Why are Kiev cutlets fried immediately?
If you do not freeze the cutlets, try to fry them immediately after breading. The fact is that the juice that is released from the meat, when left at room temperature for a long time, can “wash off” all the breading and crust from the cutlet. chicken cutlet Kiev style will have holes, which will affect the juiciness of the cutlet itself.
Other options for Kiev cutlets
Chicken Kiev - minced chicken recipe
How to cook Kyiv cutlets at home
Pass the chicken breast through a meat grinder, add spices, mix well and beat the minced meat, abruptly leaving it in a bowl so that the meat fibers “adhere” to each other and the cutlets do not fall apart during frying.
Next, we take the same steps as when preparing chicken Kiev according to the step-by-step photo recipe given above. Remove the prepared butter from the freezer and divide into equal parts according to the number of cutlets, and form cutlets. The shape of Kiev cutlets is traditionally cone-shaped and cylindrical; it is convenient to form cutlets with wet hands. Make a flat cake of minced meat in your palm, put butter on it and carefully cover with minced meat on all 2 sides so that the butter does not peek out anywhere.
Then double bread each cutlet and fry in a frying pan. It is necessary to fry minced meat cutlets in boiling oil - deep fat (oil consumption 300-400 grams), and then cook on a baking sheet in the oven for about 15 minutes.
Chicken Kiev with mushrooms
Ingredients
- chicken fillet - 1 piece
- parsley, greens - 20 g
- butter - 150 g
- pepper, salt - to taste
- milk - 1/2 cup
- paneer crackers. 150g
- fresh mushrooms - 200 g
- vegetable oil for deep frying - 300-350 ml
- chicken eggs - 2 pcs
- flour - 50-60 g
How to cook Kiev cutlets with mushrooms
Cut the fillet as follows - place the chicken meat with the outer side down and make cuts in the fillet from the middle along both sides, open each piece so that it becomes 2 times larger and there is room for the filling. Gently beat the resulting layers of meat with a knife or flat hammer.
Wash, peel, cut the mushrooms into small pieces and fry in vegetable oil, add salt, cool. Mix chopped parsley, soft butter and mushrooms until smooth. Using two tablespoons, form pieces of filling that look like quail eggs. Place them in the freezer for 5 minutes to prevent the butter pan from spreading.
Place the frozen stuffing on the fillet. Wrap the cutlet using small pieces of fillet. Put them back in the freezer to freeze.
Beat the egg with milk for breading, pepper the frozen cutlets and roll them first in flour, then in the egg and milk. Dip into breading again. Place the cutlets on a cutting board. If the crust is not thick enough, dip the cutlets in milk and breadcrumbs again.
Next, fry and bring to readiness as in the above photo recipe for Kiev cutlets. As soon as golden crust starts to get dark, remove the cutlets and serve.
It's hard to imagine a person who doesn't like cutlets. They are often made from minced meat made from various types of meat, fish, poultry and even vegetables. But the classic chicken Kiev is prepared a little differently. At the very beginning of its appearance, it was prepared as follows. The chicken fillet was beaten with a hammer, and the butter was simply “beaten” into the meat during this process.
Simply, after the meat became thin, it was salted, peppered, and then greased with butter again. This gave the finished dish extraordinary taste and tenderness. Of course, during its existence cutlet Kiev has undergone changes, and now housewives put a piece of butter in it. But the rest of the sequence remained almost the same.
The classic cooking recipe is as follows. The butter is wrapped in the beaten fillet, with a chicken bone also placed inside. This is done to make eating the cutlet convenient. Then, such a “chicken leg” is dipped in the egg mixture and rolled in breading. This cutlet is sent to the refrigerator, after which it is subjected to heat treatment in deep fat.
You should only eat this cutlet with your hands. But be careful! The meat is very juicy, so don't burn yourself.
Chicken Kiev: recipes
Of course, now there are many recipes for cooking Chicken Kiev. Each recipe has its own subtleties and highlights. If you wish, you can add various fillings to the fillet in addition to butter.
“Original Kiev cutlets”
To prepare “Original Chicken Kiev” you will need:
- 1 PC. skinless chicken breast
- 100 g butter
- 1 PC. egg
- 100 g crackers from white bread
- 50 g parsley
- 1\3 tsp. salt
- 1\4 tsp. freshly ground black pepper
- 100 g vegetable oil
Recipe for “Original Kiev cutlets”
- Before you decide to cook this dish, make sure that you have two bones from the legs or wings of the chicken.
- Now start preparing the dish. Wash the chicken breast. Carefully cut the fillet in half and make slits. You need to get a large layer. It needs to be placed on cling film, covering it on top. This is necessary so that the juice does not come out of the meat and does not splash everything around.
- After this, carefully beat the fillet. Rub it with salt and sprinkle a little pepper. In the meantime, start preparing the filling. To do this, you first need to take the butter out of the refrigerator and let it melt a little.
- Wash and chop the parsley. Mix it thoroughly with oil. After obtaining a homogeneous mass, use a spoon to form small, even patties. Place the resulting filling in the freezer for a few minutes.
- After it freezes, start forming the cutlets. To do this, beat the egg in a bowl, chop the crackers and place on a flat plate. Place pieces of butter and bones into the fillet and carefully “swaddle” them. Dip the resulting cutlets into the egg and then into the breadcrumbs.
- After this, repeat the breading process again. Place the resulting cutlets in heated vegetable oil and fry thoroughly.
"Kiev cutlets with mushrooms"
To prepare “Cutlets Kiev with mushrooms” you will need:
- 1 kg chicken breast
- 10 pieces. chicken eggs
- 20 g sour cream
- 400 g loaf
- 200 g butter
- 300 g mushrooms
- 1 PC. medium bulb
- 100 g dill or parsley
- 800 g vegetable oil
Recipe for “Kiev cutlet with mushrooms”
- First, start preparing the filling. Chop the mushrooms and onions and fry them together. Cut the butter into small cubes.
- Wash the greens thoroughly, dry and chop. Cut the breast into layers and beat well. Lightly salt the resulting plates.
- Place the mushroom mixture on them, a piece of butter and sprinkle with herbs. Then, carefully wrap the cutlets and place them in the freezer.
- Prepare the breading from the loaf, beat the eggs together with sour cream. Dip the cutlets in eggs and breadcrumbs, then fry.
Enjoy your meal!